Installing a Wood Stove into a Shed, Garden Room or Summerhouse
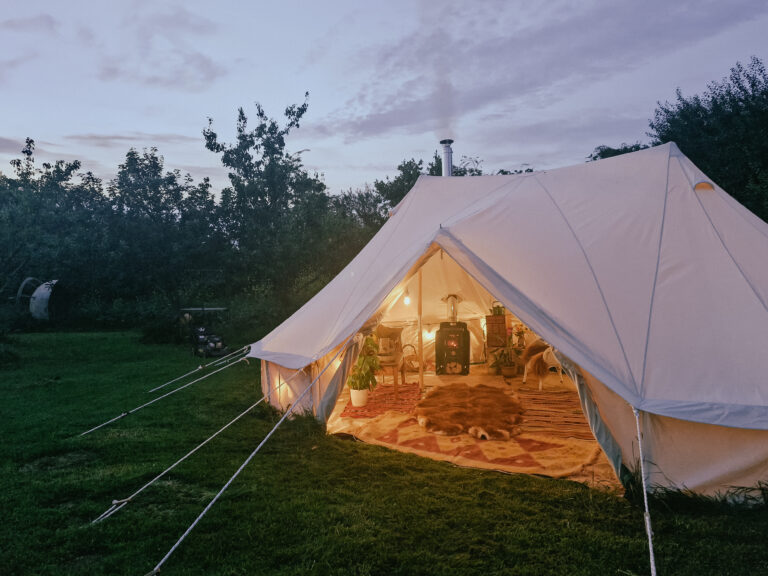
A shed, garden room or summerhouse can be the perfect retreat from daily life, offering a versatile space for countless activities. Whether you use this space as a garden office, a creative workshop or simply a quiet corner to read, unwind, or cook, adding one of our compact stoves will bring warmth and comfort to your shed sanctuary.
Even when installing a stove in a shed, garden room or summerhouse it’s essential to follow the guidelines set out in Approved Document J as much as possible. This post is a step-by-step guide on how to install a log burner into a shed, garden room or summerhouse, but if you are unsure or uncomfortable about DIY, contact an installer to carry out the installation.
Important Installation Points to Consider
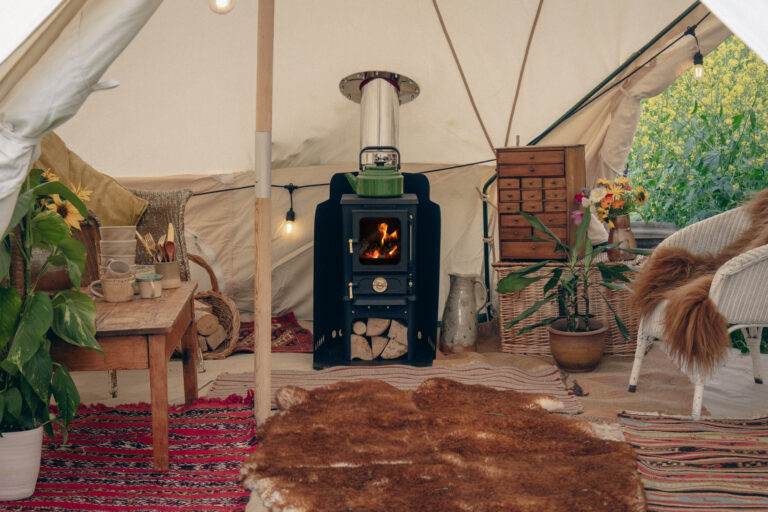
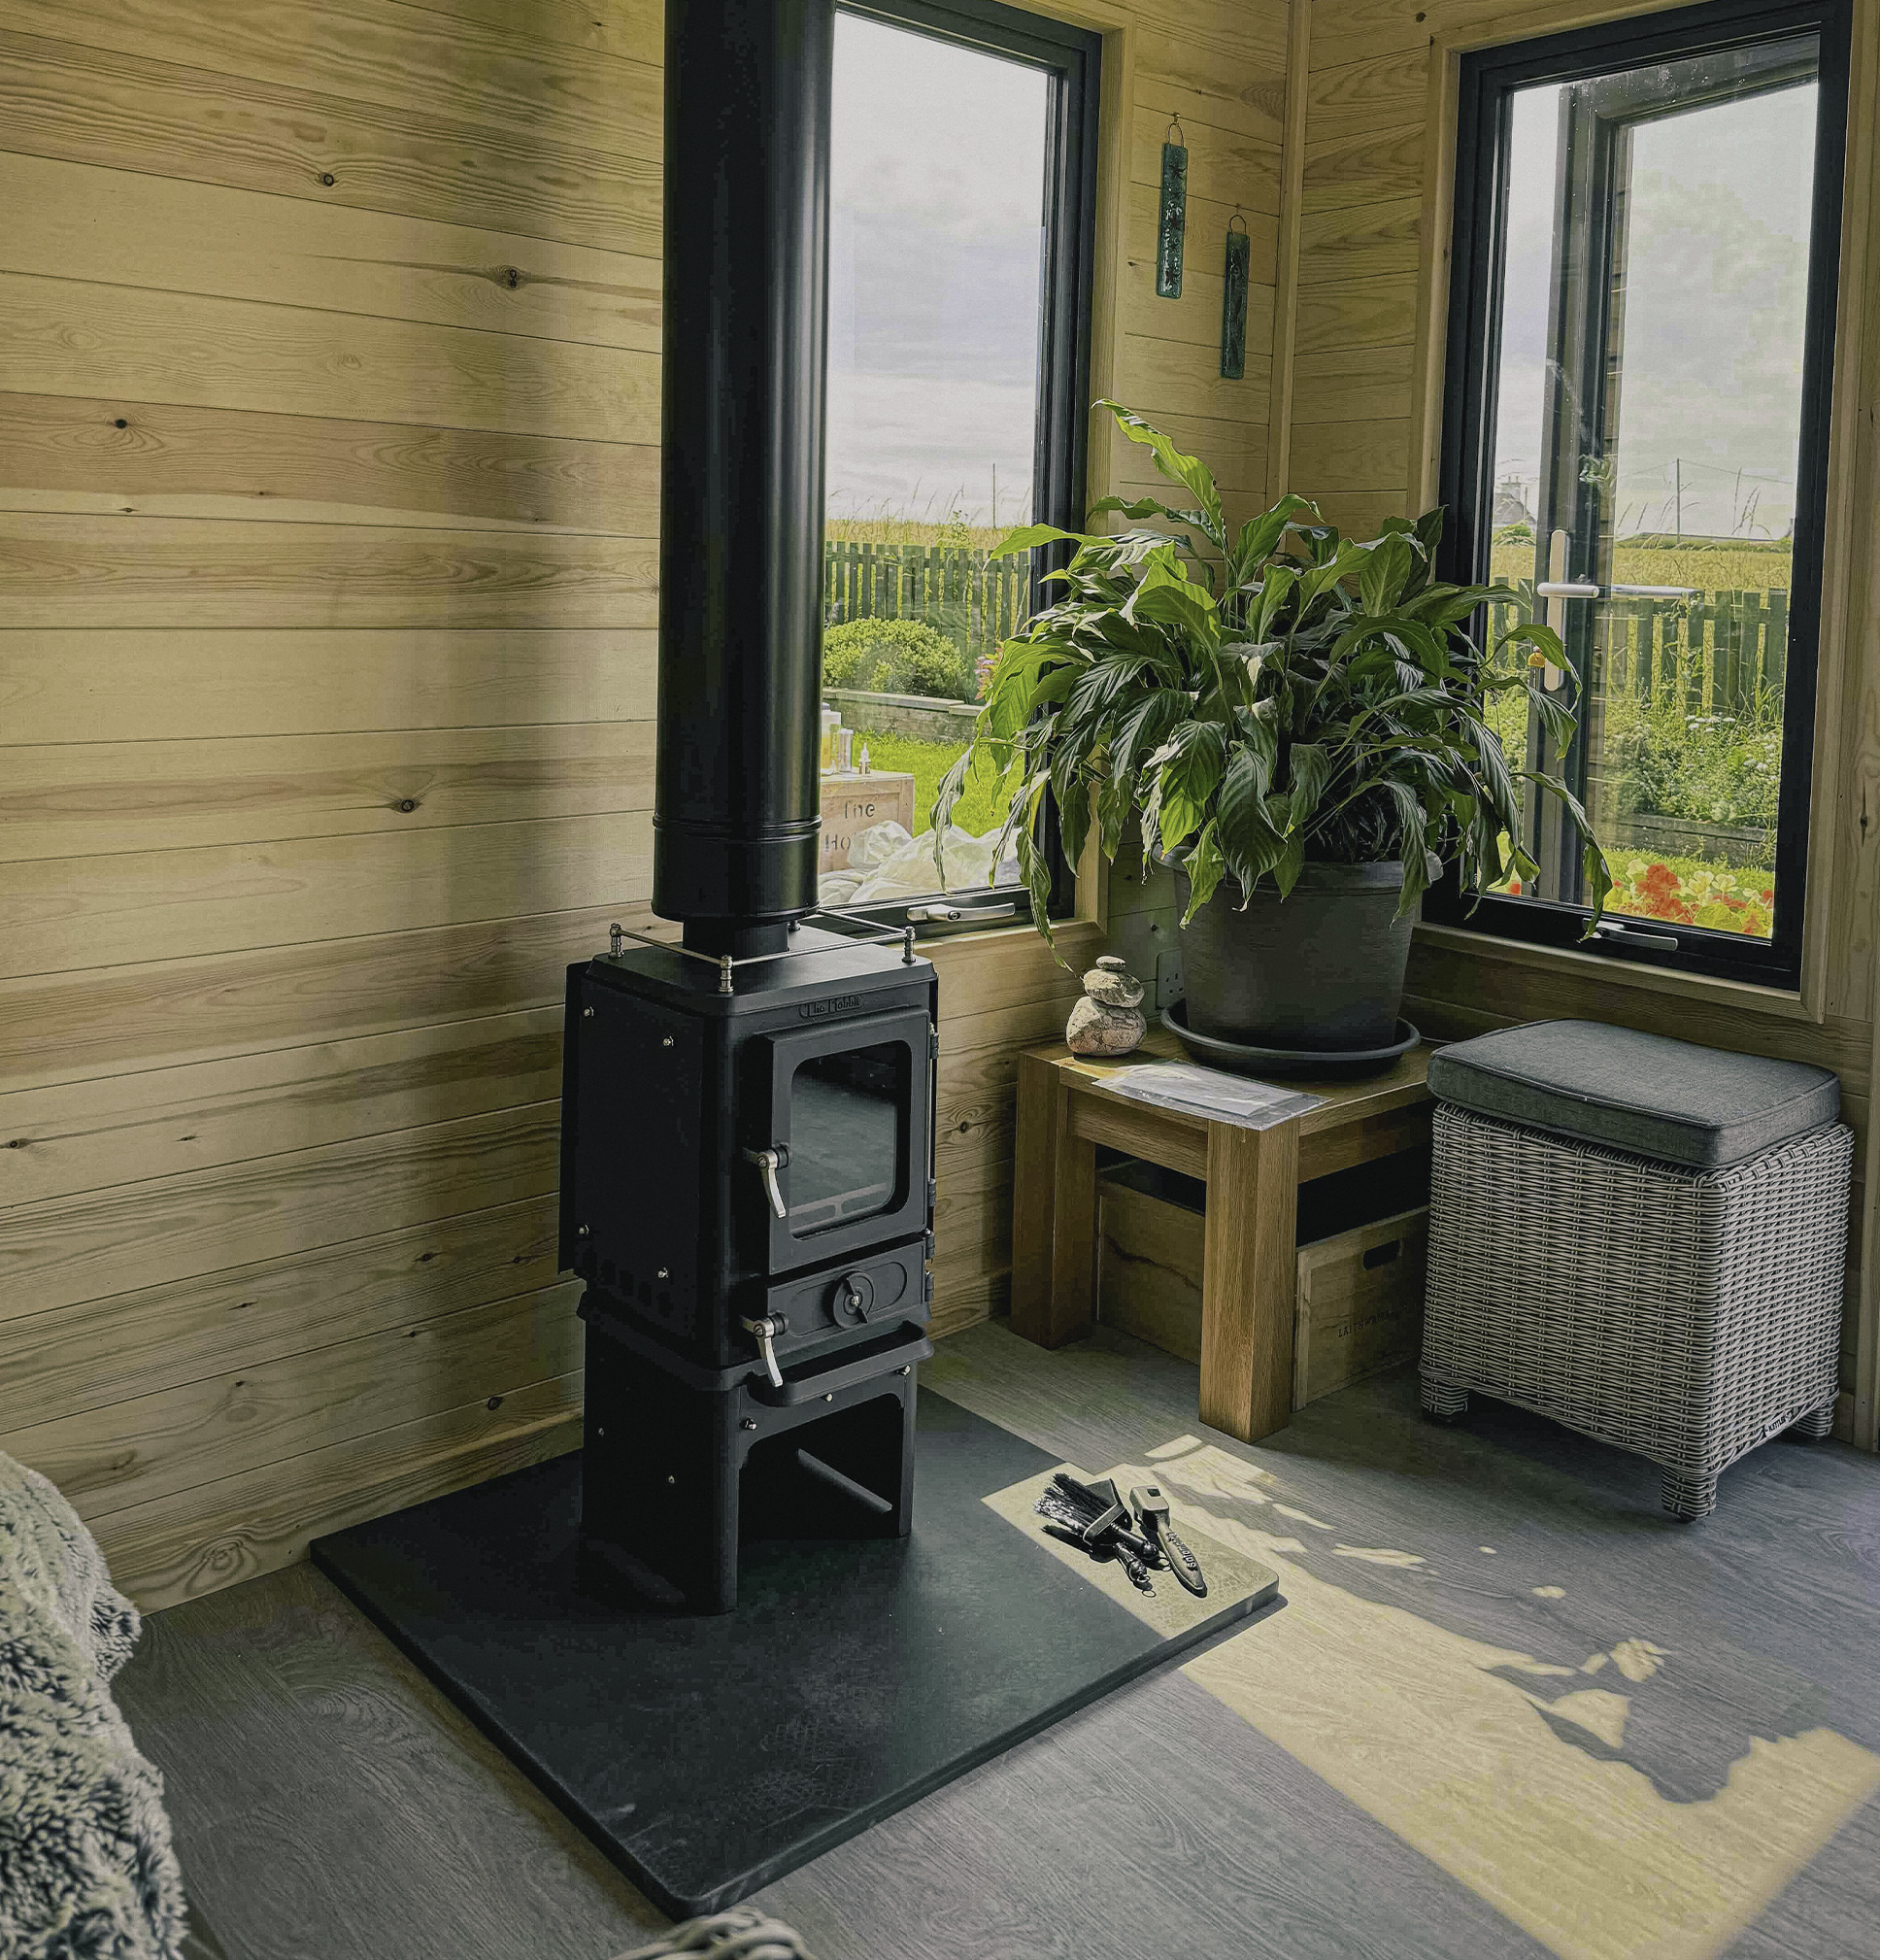
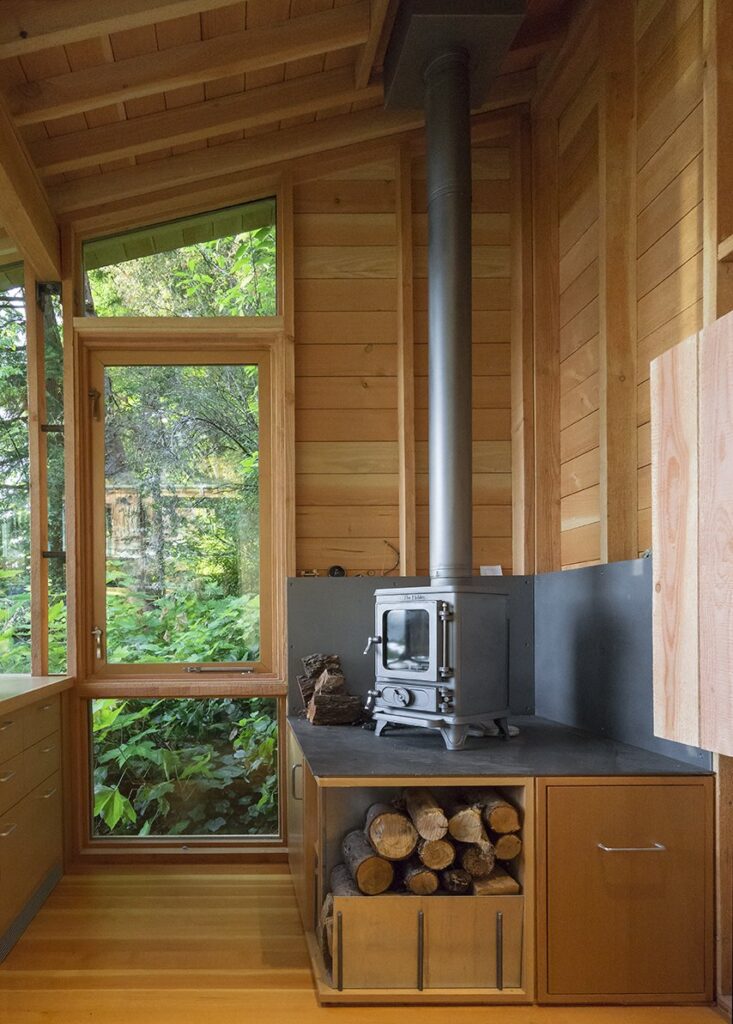
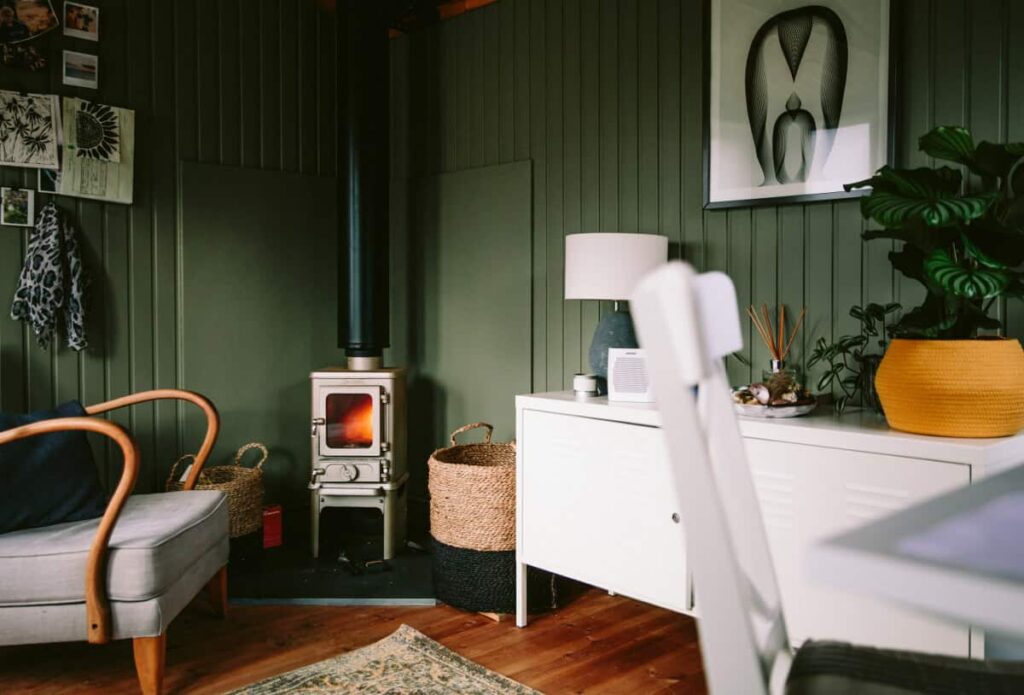
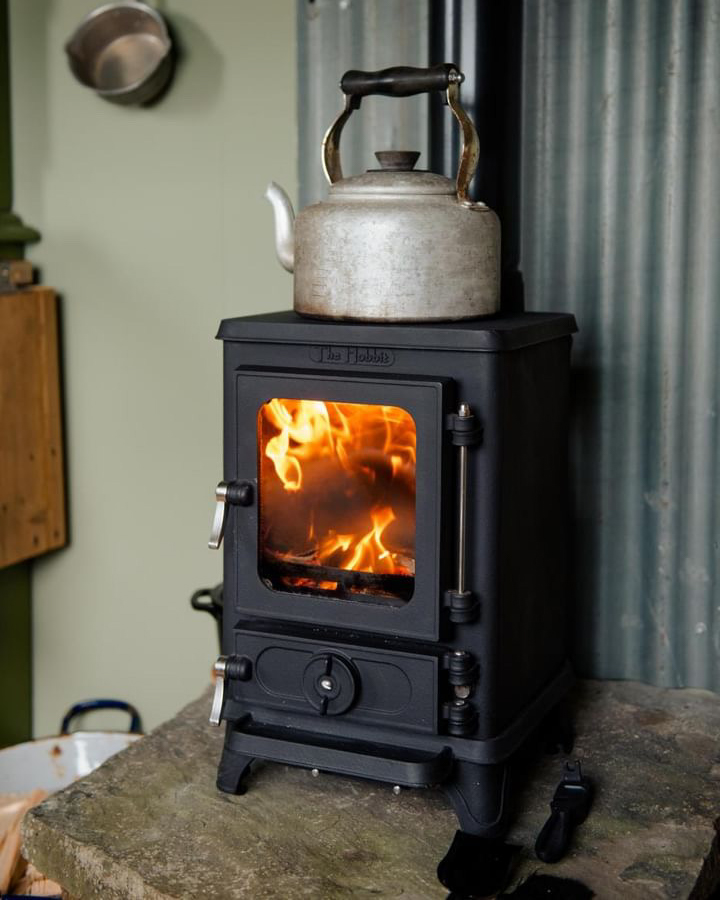
- The small stove – The Hobbit Stove
- Shielding – stove heatshields or wall shielding
- Your flue kit – choose from our small stove flue kits
- Your hearth – a 12mm thick non-combustible hearth is required for our small stoves
- Your safety – carbon monoxide alarms and ventilation
- The tools required for the job
Why Choose our Small Stove for your Shed, Garden Room or Summerhouse
When choosing a stove for a garden room, it is important to consider the size and heat output. A wood burning stove with a large heat output can risk overpowering the space, whereas a low heat output might not cut it.
The Hobbit Stove is specifically designed for small spaces such as sheds, garden rooms and summerhouses as it produces between 3kW and 5.6kW of heat with an average heat output of 4.1kW, making it perfectly sized for these outbuildings. For example, it will suit a 20ft x 10ft space – the average shed size.
Shop The Hobbit Stove Garden Room Offer | Stove & Flue Kit Bundle and save 15% on a Hobbit Stove and Flue Kit


Shielding Combustible Surfaces
A common material used for sheds, garden rooms and summerhouses is timber. Due to the usual small size of these spaces, you will need to consider the stove’s distance to any combustible materials and how you could reduce these.
The Hobbit Stove clearances
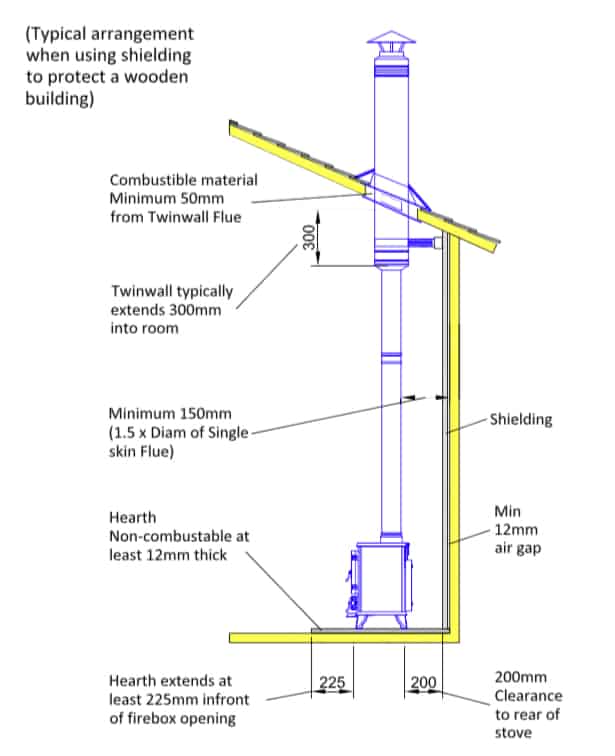
- Distance to combustible materials: 400mm to the sides, 450mm to the back
- Distance to shielded combustible materials: 200mm to the sides and to the back
- Distance to combustible materials with stove heatshields: 150mm to the sides, 100mm frotom the back
- Distance to shielded combustible materials with stove heatshields: 100mm to the sides and to the back
Single wall flue pipe requires 3x it’s diameter to combustibles and 1.5x it’s diameter to shielded combustibles, whereas twin wall flue pipe requires 50mm/2” clearance to combustibles. The hole to cut through any combustible materials should be 100mm/4” larger overall in diameter than the external diameter of the twin wall pipe.
If you have a non-combustible material that the flue pipe is to pass through this can be the same diameter as the pipe (7”). But we would recommend making it very slightly larger so you do not scratch the flue pipe when installing it.
Wall shielding can be done in 2 ways: vermiculite shielding 25mm thick on a 12mm airgap on spacers, or 1.5mm metal shield on a 25mm airgap on spacers.
If you add shielding to the wall, we recommend extending this to at least 200mm above the height of the stove. This protects the wall from the heat coming from the top of the stove. You may need to increase further if using single wall.
Choosing Your Small Stove Flue Kit
We have designed several different flue kits for sheds, garden rooms and summerhouses. We do offer a free bespoke flue consultancy if you need a different setup to what we have designed, just get in touch!
The Hearth
Hearth requirements for The Hobbit Stove:
- 12mm thick
- 225mm extended from the front of the stove
- 150mm each side and at the back
- Made from a non-combustible material such as slate, glass, marble, stone or heat resistant tiles
- The Hobbit Stove does not require a constructional hearth, as it does not heat the hearth beneath more than 100 degrees.
- If you are having a stand, you still need a hearth
- It can be laid on a combustible material such as carpet or a wooden floor, so long as the requirements above are met.
The hearth must provide a “visually apparent warning” (see Approved Document J 2.26). This prevents you from simply placing your stove onto a solid floor, such as a tiled kitchen floor, for example, without any discernible visible edge.
Safety & Ventilation
- Install a carbon monoxide alarm
- Install an air vent near the stove to allow for good ventalation
- Consider choosing the direct air option if your space is particularly small. This system allows secondary air from outside to draw directly into the stove, to avoid the stove and yourself fighting for air.
How to Install a Wood Stove into a Shed, Garden Room or Summerhouse
Below is an example installation guide, but please note that this will change depending on your setup; this is just a guide.
Tools Required:
- A drill with the correct drill parts
- Jigsaw or nibbler tool
- Spirit level
- Screw driver
- Cartridge gun
- Knife
- Marker pen
- Extension lead
- Step ladder
Step 1: The hearth
The hearth needs to be secured on some pads of carpet, adhesive or sand or a stiff mortar. Once the hearth has been positioned the stove can be positioned and the centre point for the flue found by using a plumb line or spirit level.
Step 2: Wall sheilding
If you are installing shielding to your walls, this can be done in one of the two ways discussed above. We recommend doing this before fully fitting your stove and stove, to allow easier access.
Here is an example diagram of a fitting:
Step 3: Cutting the hole
Now your centre point has been found in step 1, mark the edge of the hole and drill with a 10mm drill bit and then cut the hole out using a jigsaw tool. The hole on the outside can be cut using either a jigsaw or a nibbler tool to the sizes shown above.
Step 4: Putting the flue together
We find it easier to start from the stove and work upward from there. Always do a dry fit to ensure everything fits your requirements before going ahead and sealing.
Single wall flue has fire cement on its joints as well as a joint clip where 2 single wall lengths connect. Twin wall lengths do not use a sealant to join, but they have locking bands to secure the pieces together.
Once the single wall is fitted, the single to twin wall adaptor is next, followed by the lengths of twin wall.
Step 5: Ancillary pieces
Wall band(s) – All kits will have at least one of these and they connect the twin wall flue pipe to the wall to add stability to the flue system. A wall band extension can be added for when the flue pipe is further than 50mm from the wall. Leave the wall band loose until the end of the fitting.
Trim plate – These can be flat or pitched, as well as solid or split and adjustable. If you are fitting a solid trim plate like this one then you will need to add this when installing the twin wall flue as it cannot be fitted afterward. The split trim plates can be fitted at the end of the installation as they are in 2 pieces.
They are used on the ceiling to cover the excess hole that has been made for clearances.
Step 6: The flashing
There are different types of flashing such as roof plate flashings and silicone flashings. Roof plates tend to be used for combustible roofs such as felt and EPDM whereas the silicone flashing is used on metal roofs.
A full install guide for the silicone flashing can be viewed here. Heatproof silicone can be used on the outside where the flue passes through to aid a weatherproof seal.
Step 7: The cowl
This is fitted to the top of the final section of twin wall pipe, and there are 2 main types we recommend: Standard Cowl and the AD Cowl.
The AD cowl is used in very windy locations as well as installations where there are obstructions to the flue, such as trees as these can cause a down draught.
Step 8: Final steps
Tighten all the locking bands on the twin wall pipe and the wall band. Secure the trim plate to the ceiling.
Step 9: Firing
You are ready for your first fire! This will cure the painted finish on the stove, so it should be done with the space fully ventilated.
You must start with a couple of small fires to allow the paint to slowly and properly cure. You can start by burning some firelighters and a few bits of kindling, being sure to let each fire go out and allowing the stove to cool down before you light your second small fire. After this, your small stove is good to go!
With each flue kit you will receive a step-by-step installation guide specific to that kit. But if you did have any questions at all about the installation process, please contact us and our team would be happy to help!