Installing a Wood Stove into a Tiny Home
To truly create that real cosy hygge feeling inside your tiny home there is no real substitute for a wood fired stove.
The radiant heat and glow mixed with the warm light it throws around any space is transformative in the feelings of snugness it produces.
Not only could it provide heat and cooking but also if fitted with a boiler option can produce heat for a radiator or hot water tank.
But how do I go about installing a wood stove in my tiny home and on the tiny budget I have?
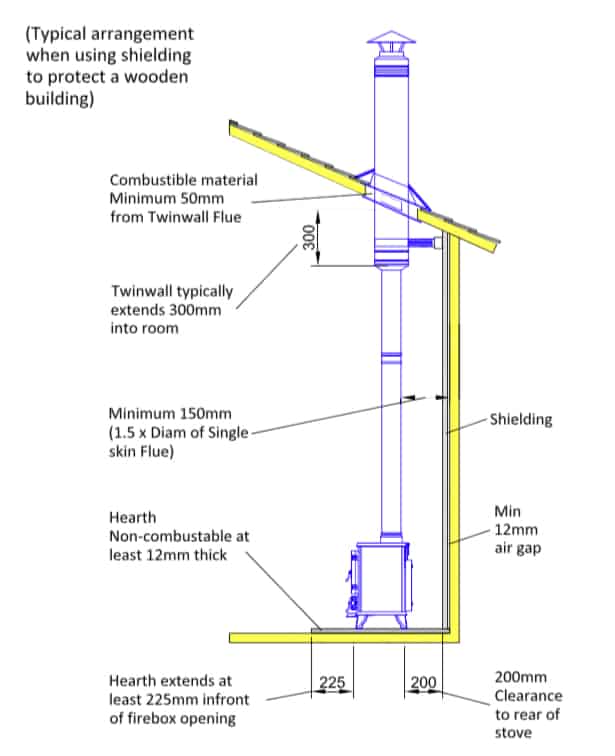
There is no escape from the fact that the project will require buying both the stove and flue as well as preparing the space where the stove is going to sit. All of these elements can possibly be sourced second hand but we wouldn’t suggest scrimping on quality of the stove and flue, as you may have issues later down the line and have to fork out even more money! Consequently, in reality the budget for this part of your build is around £1500. Put together a tiny home flue kit that will give you years of trouble free service rather than a mix and match collection of flue parts which end up needing to be replaced after only a short time.
The flue system is the engine of your wood stove so it is important to get it right. The effectiveness of the draw will be down to how high and how well insulated the external flue parts are. The incorporation of an anti-down draught cowl can also assist in promoting a better draw. The flue is quite short so I would suggest a good way to extend the height is to have a system which allows you to add an extra length when on site, or can also be removed for when the tiny home is moving.
Key points worth considering before you start
Safety
Along with a fire blanket in your kitchen area and a small fire extinguisher ideally located in the middle zone of your tiny home you should also make sure that you install a smoke and carbon monoxide alarm. They are a reasonably inexpensive bit of kit that could possibly save your life, so it is a no brainer not to buy one!
Right, with the serious bit sorted we can focus in on the exciting prospect of realising the dream of cosy nights tucked up in your tiny home watching the warm glow of a fire inside your tiny stove. It is easy to conjure the image but there are several important areas to give consideration when planning where and how you are going to install your stove.

Stove requirements
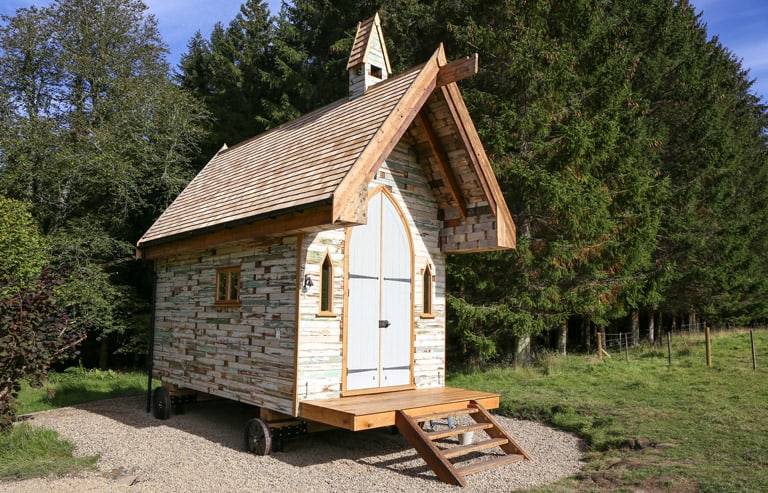
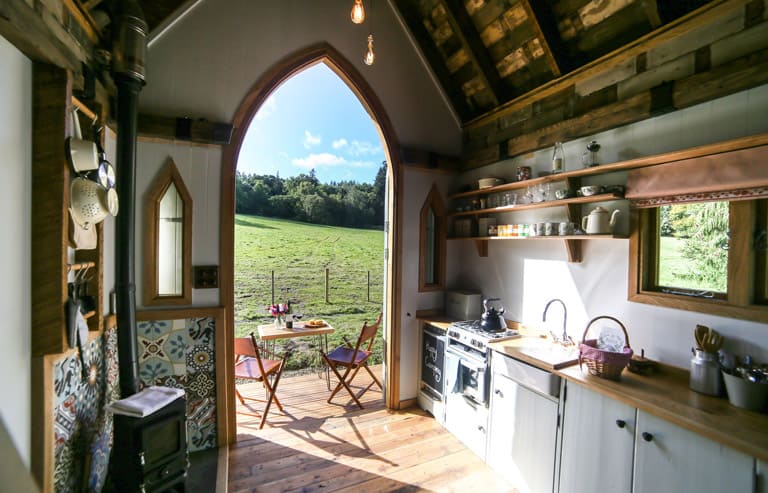
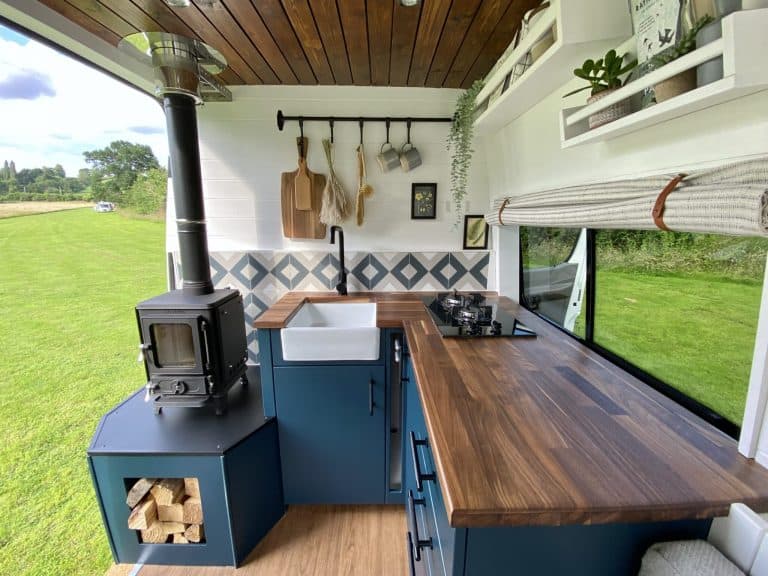
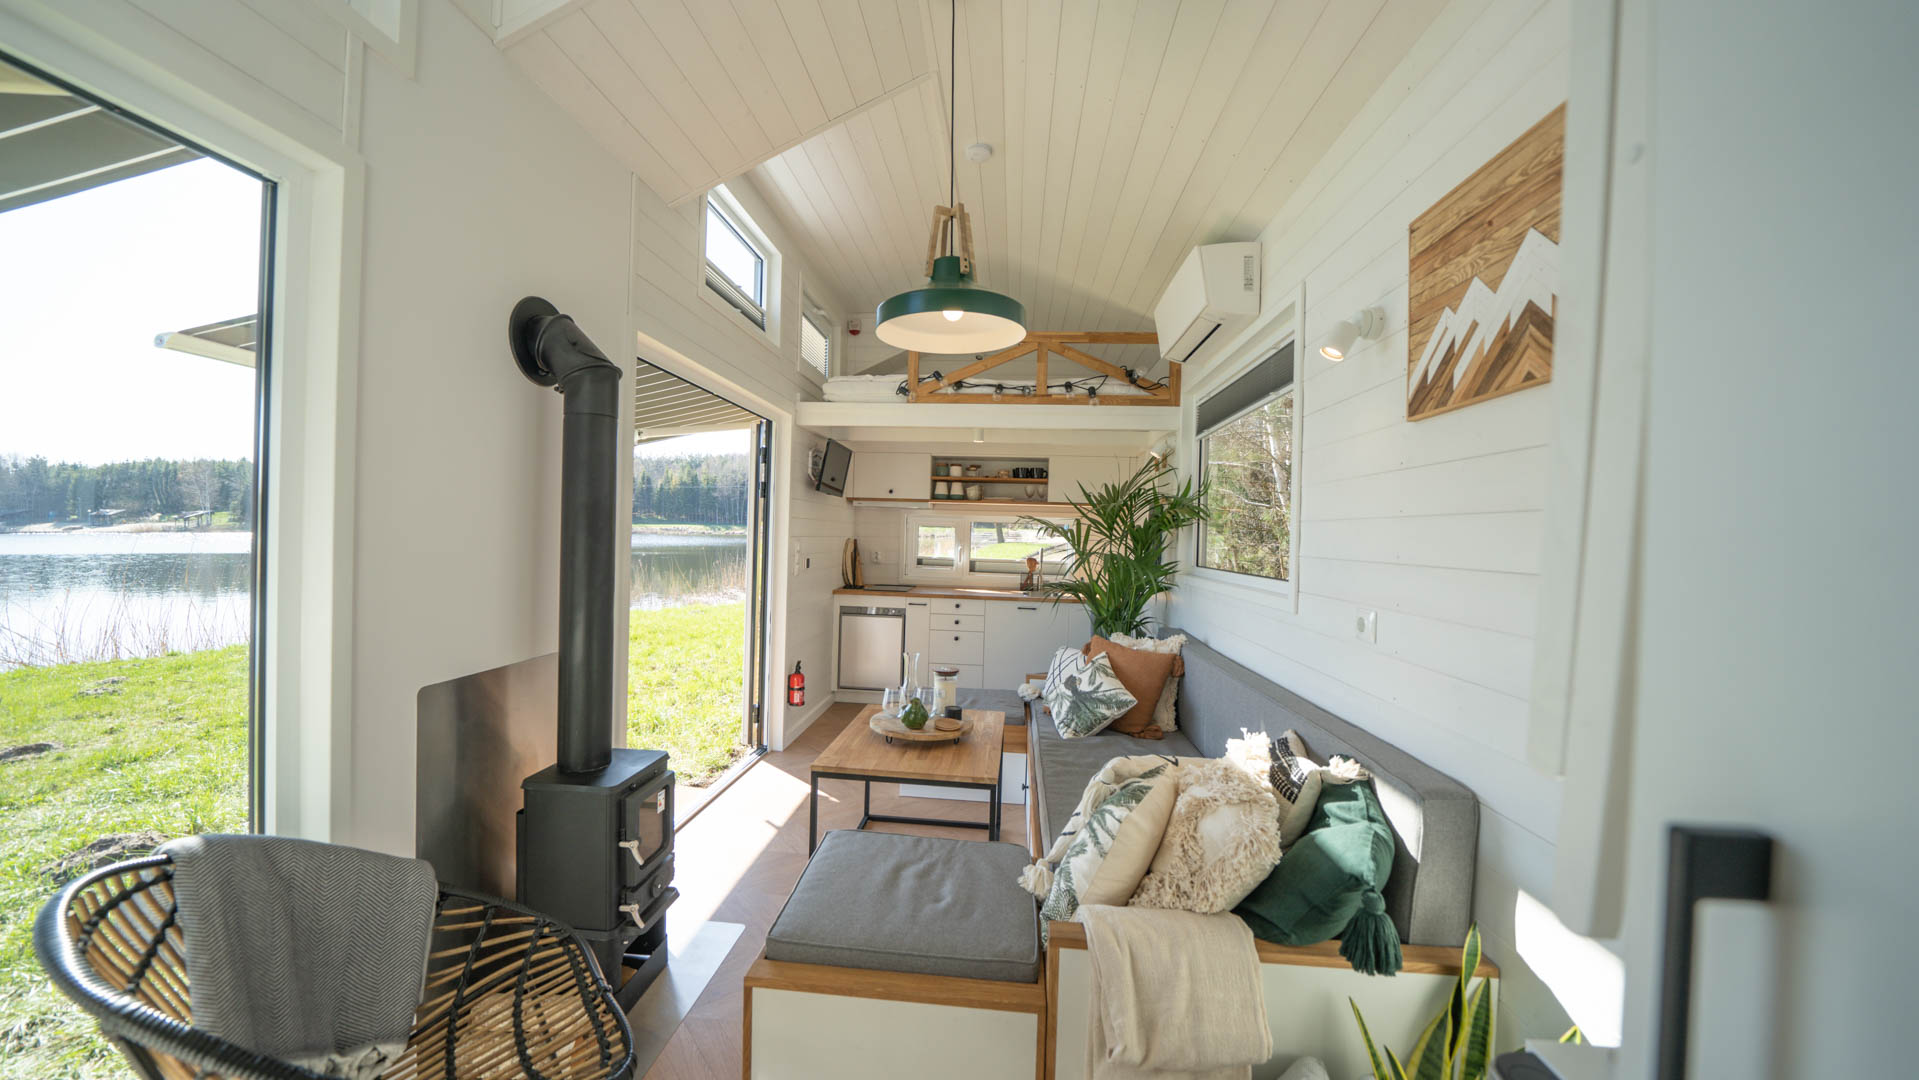
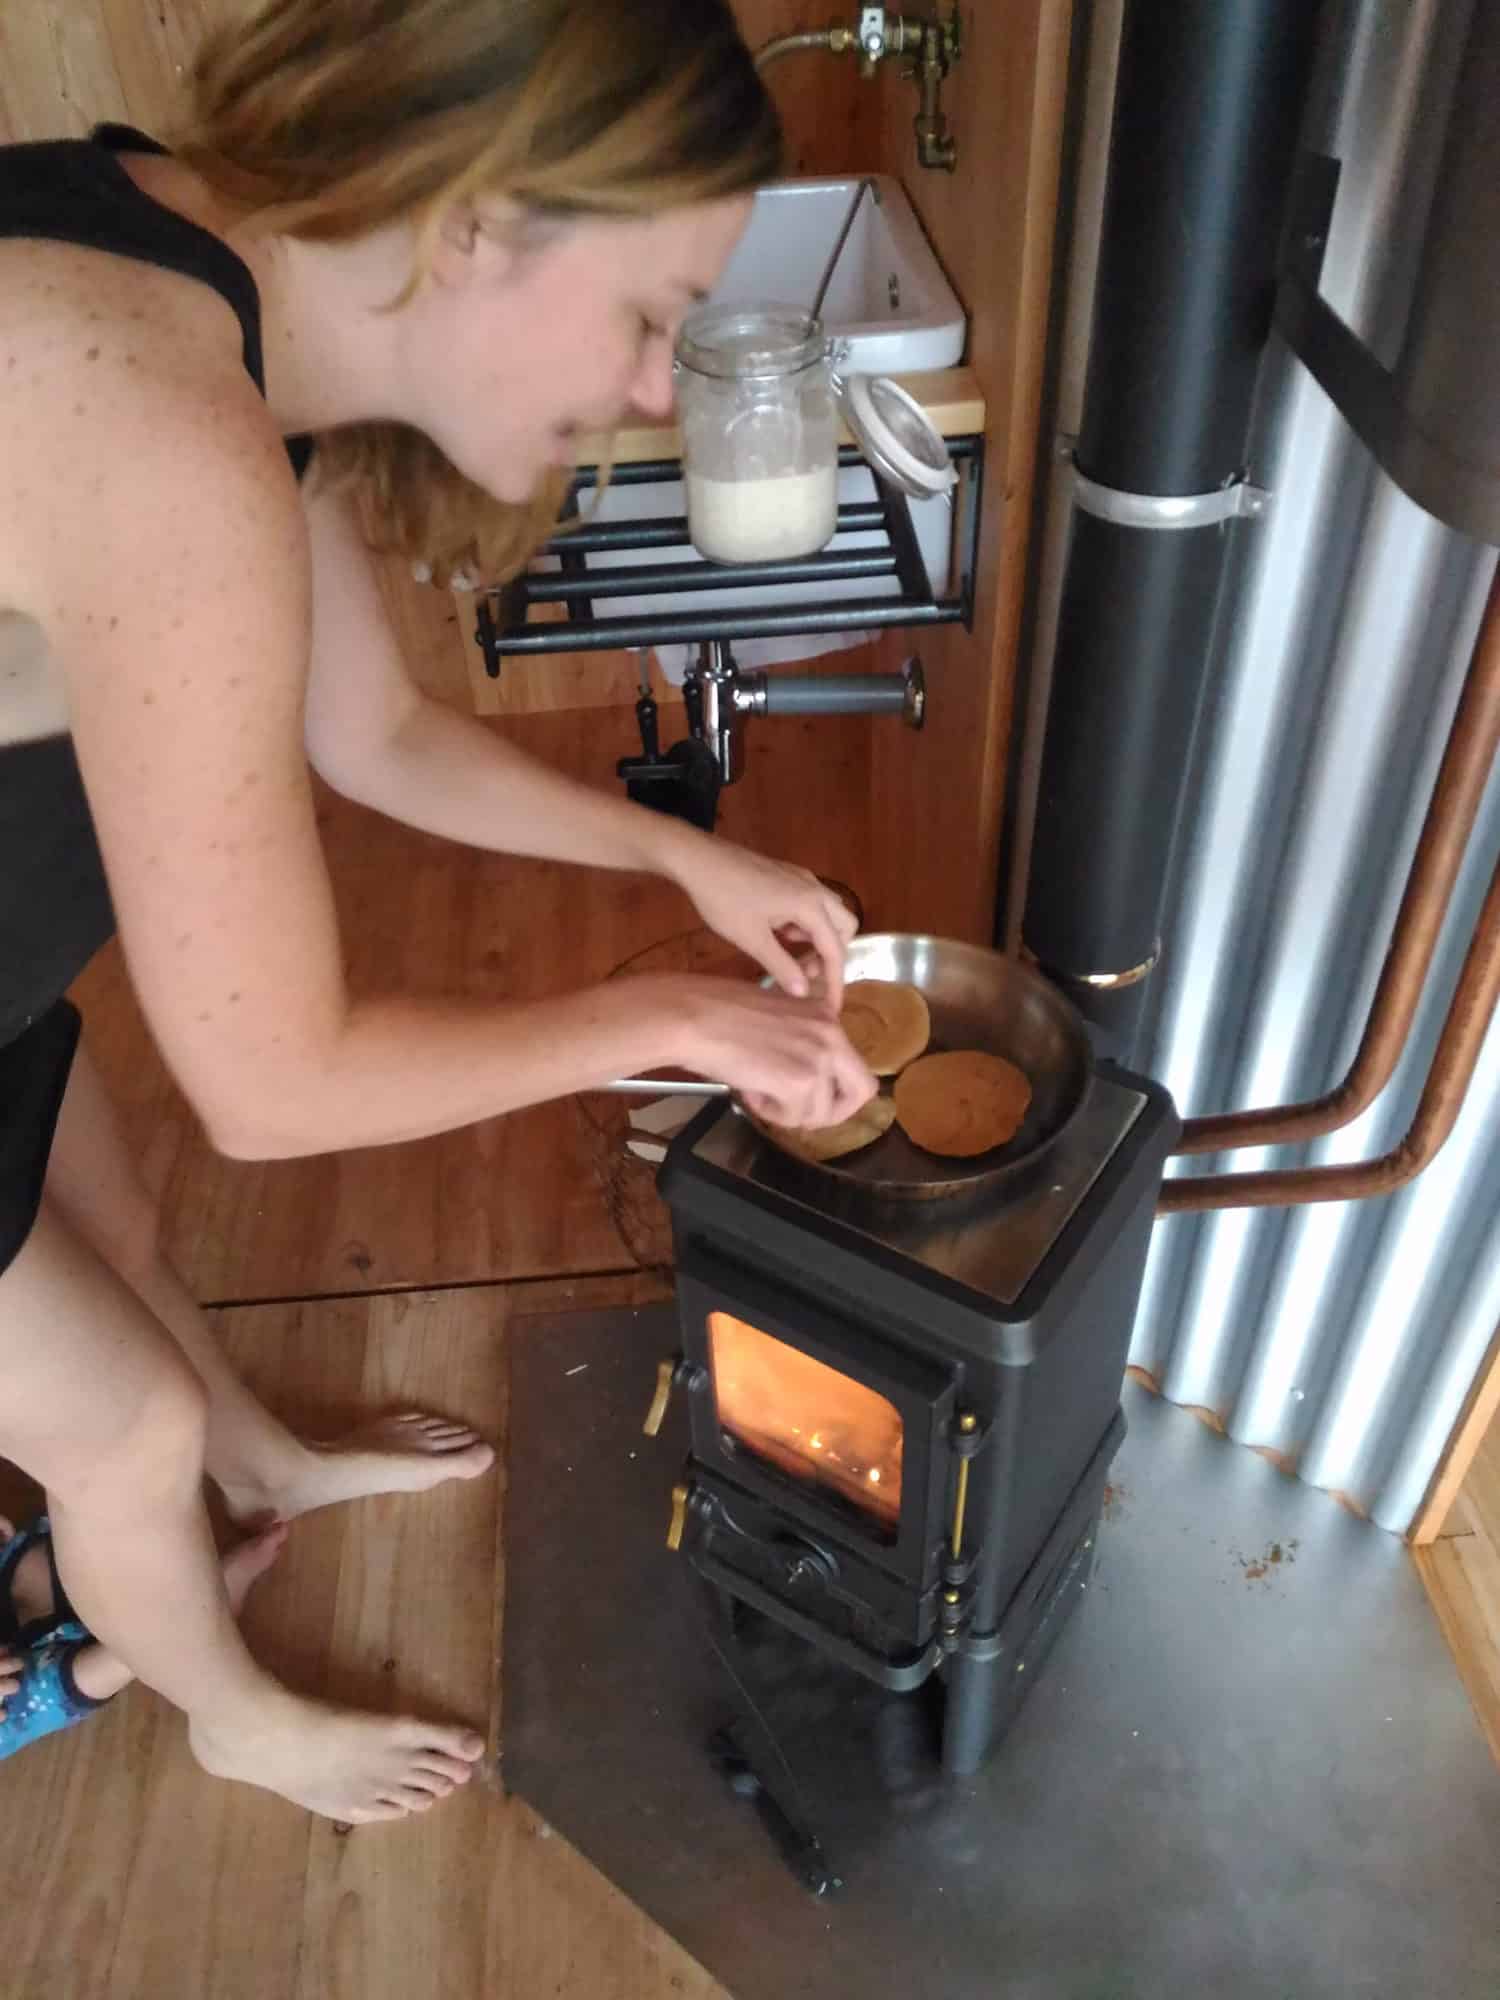
In the picture opposite you can see that we use the tiny home we made as a place to go and unwind a little from the rigours of work. The space is designed accordingly and is specific to our needs. This is the first thing to think about when considering installing a stove in your tiny home. What do you want it to do other than the obvious. Do you also want it to cook on? heat water? These additional factors may well adjust the location and orientation of your stove.
Visit the little blog we put together showing how our tiny home space came together – MAKING OUR TINY HOME SPACE
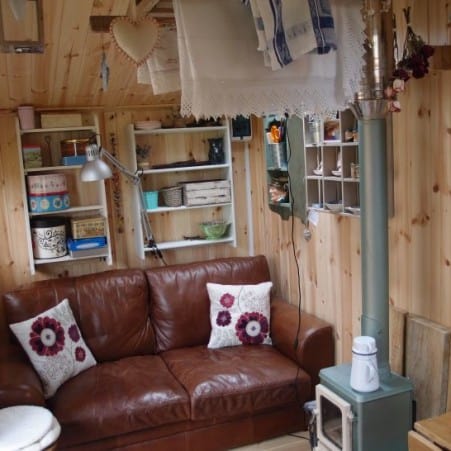
Your tiny stove even though small will take up more space than just the footprint of the stove itself. You will also need to shield the adjacent combustible materials with insulating or vermiculite board. These could then either be painted to match the rest of the decor or the area could be made more of a feature by incorporating tiles or stainless steel for example. An image sent to us of our tiny stove installed in a caravan in Switzerland is so far the most individual embellishment we have seen. The artist decorated her shielding with some risqué spray can painting which is certainly eye catching! To see the artwork visit the post on my Facebook page.
Stove points to consider when choosing your tiny wood stove.
Does your stove have a direct air system?
If your tiny home is going to be fairly air tight then you may well want to consider choosing a wood stove that has a direct air system. The best systems allow you not only to control the burn rate but also allow independent control of both the primary and secondary air. Systems that just allow unregulated air into the fire box and then use a baffle in the flue are much more susceptible to potentially dangerous CO issues if the flue became blocked. We would suggest that it is a key factor worth considering. Whilst there are many benefits to having a stove fed directly with it’s own combustion air source it must not be seen as a replacement for the installation of an air vent. This vent should be installed behind, beneath or as close to the stove as possible to ensure that there is enough air in the ‘cabin’ to sustain both you and the stove. Deficient air flow through the cabin and no direct air feed will only result in an inefficient poor draw. The poor flue engine will then result in poor stove performance.
Here is an interesting article on the subject of direct air fed stoves.

Can your stove be bolted down?
Your stove as indeed your flue will need to be well secured for when your tiny home is in transit. For this reason you must choose a stove that has the ability to be easily bolted down. This can be done to the chassis or minimum to the hearth that the stove needs to sit on. If you mount the stove on a raised area then the stove needs to be bolted to this well enough that in the event of a bump it can take the force of its weight. Each leg on the Hobbit stove has a small area cast inside and behind each leg where the securing bolt can be fixed. The same system is used on the optional log stand.
How much is the whole ‘wood stove install’ project likely to cost?
- Hobbit Stove = £810
- Direct air = £195
- Tiny home flue kit = between £625 and £705
- Shielding & hearth plate = around £150
- Sundries = around £50.
Total £1830 – £1910
You can spend a little less by salvaging material such as insulate board which when painted would be as good as new. Or an old sheet of metal or tin sign that you could sit the stove on would save you from buying new.
Has the stove been independently certificated?
If the stove you choose has not been certificated how will you know how close it can be to shielded materials and how much heat output it provides? Even though you do not need to be governed by the regulations in a planning sense there is always the gnarly thought about what if something does go wrong would your insurance company pay out or try and wriggle around this by pointing out your stove had not even had an independent test to show it’s heat out put, level of particulate emissions and level of efficiency, let alone it’s safe distances. I would therefore recommend whichever stove you choose, even if it is not EPA certificated that it has at least its own countries independent certification. All of our stoves have been independently test and certified.
Shielding is needed behind and/or to the sides of the stove to allow it to be fitted in closer proximity to combustible materials. The stove parameters for this would have been calculated during the independent certification of the stove.
Ventilation – buy an air vent
What flue system do I need to install my stove?
What flue parts you need for installing a stove in your tiny home really depends on the proposed route for the flue and dimensions of the tiny home from floor to flue exit point. Many want to exit through the wall but this is an expensive option and is less easy to deconstruct when the tiny home is in transit. A roof exit with a removable and/or additional length to increase the draw and not be knocked off half way down the road, is preferable.
We offer a free bespoke flue consultancy, if you need any help with your flue system then please do email us: grace@salamanderstoves.com. Also take a look at our Tiny Home Flue Kits.
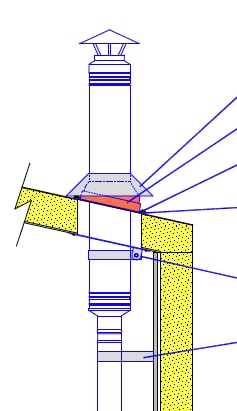
Regulations.
The regulations involved with fitting a stove.
Really helpful graphic showing a summary of BS8511:2010