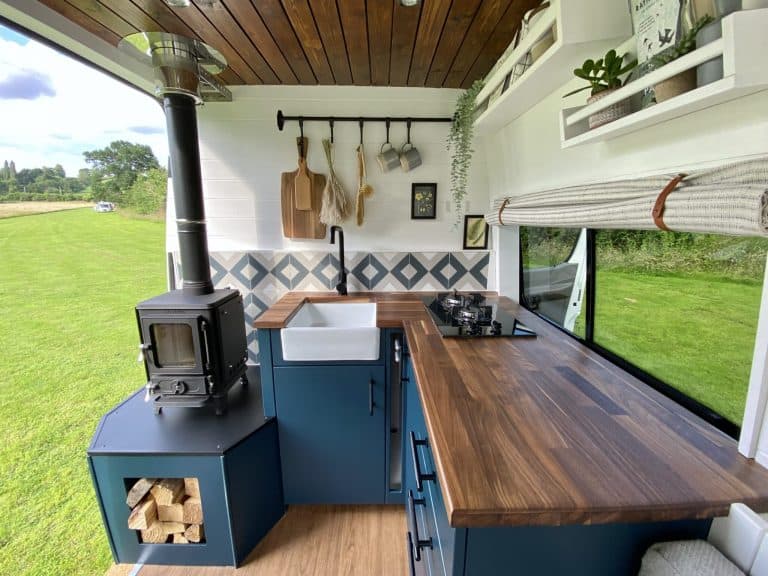
The Best Small Log Burner For Your Van
In this article, we’ll explain a few basic points that you will need to consider when it comes to installing a small wood stove into a vehicle. This could be a campervan, a horse box, RV or any other vehicle which is fairly air tight! Check out our case studies to see how other people have installed their Hobbit stove!
You can watch our video below to see how your small wood burner should be installed, or you can read the rest of this article, which will guide you through each step to installing a small wood stove into a vehicle!
Installing a small wood stove into a vehicle – bolting the stove down
If you’re looking to install a small wood burning stove into a moving vehicle, then you’ll need to make sure that your stove is fitted securely. Your tiny wood burner will need to be firmly bolted to a surface, whether you decide to site your small wood stove on a platform or on the floor of the van itself.
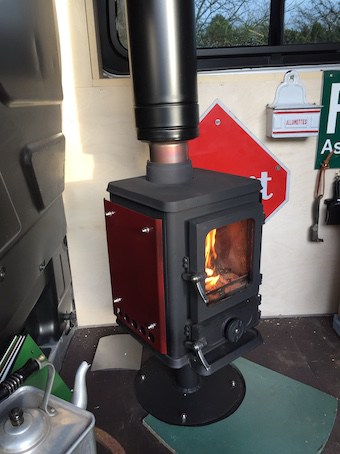
In our video, you can see that the Hobbit stove is on our pedestal stand, which has been bolted through the floor of the van, with a nut at the bottom. This means that the stove won’t go anywhere if your van happens to be involved in a crash!
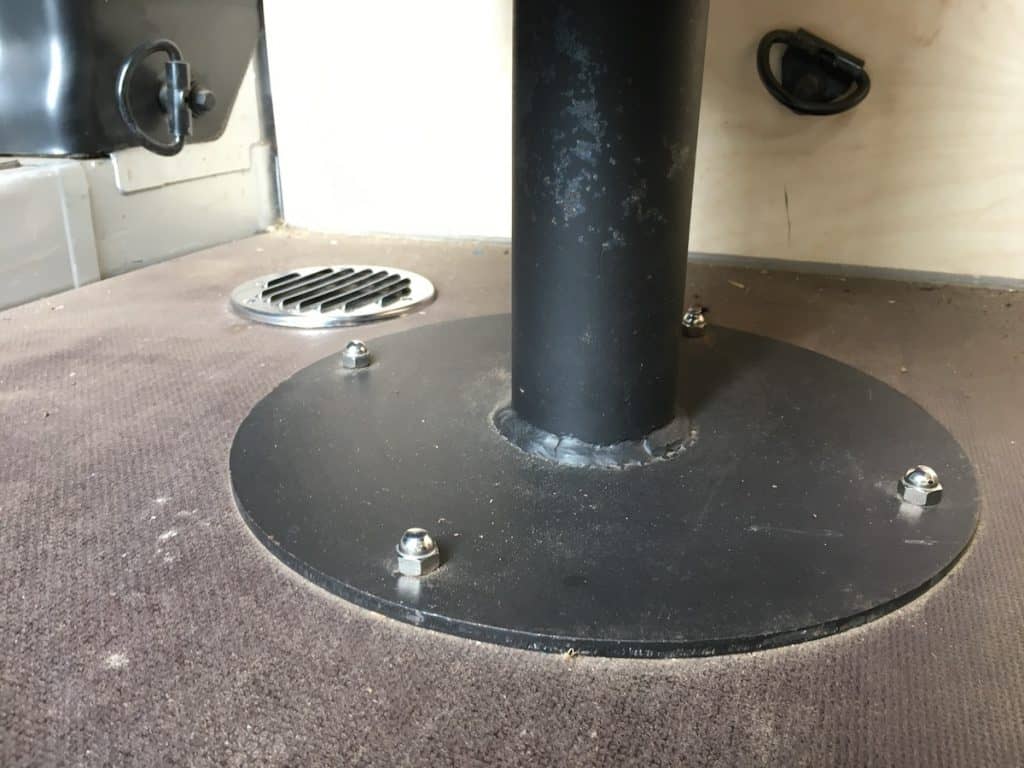
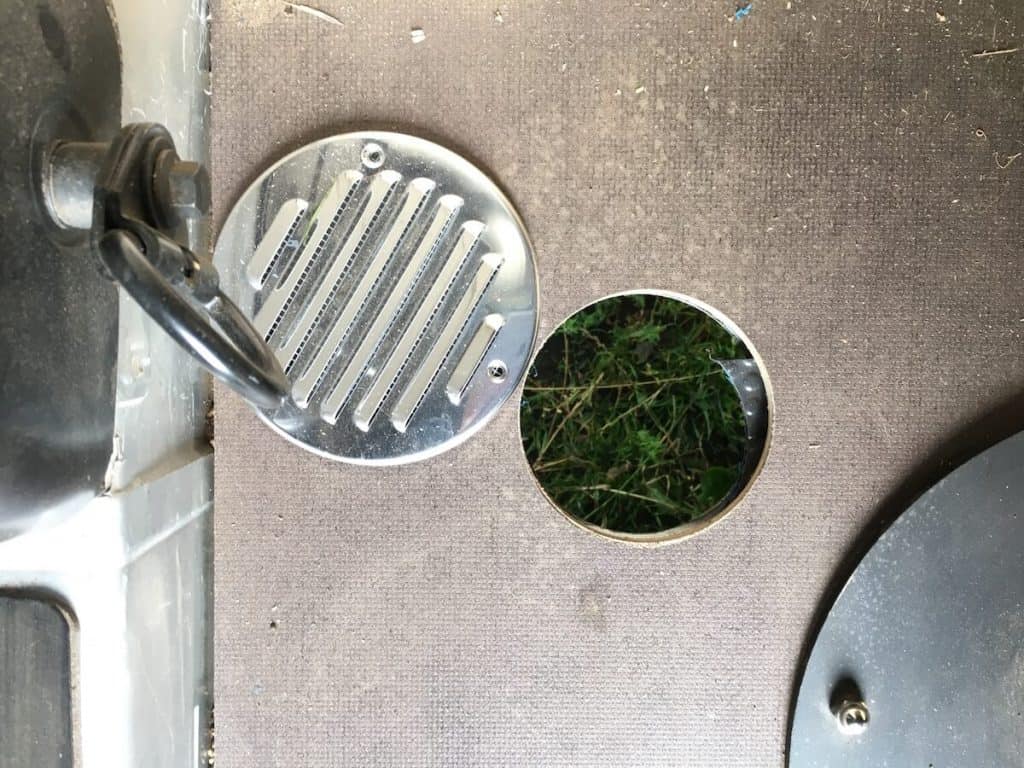
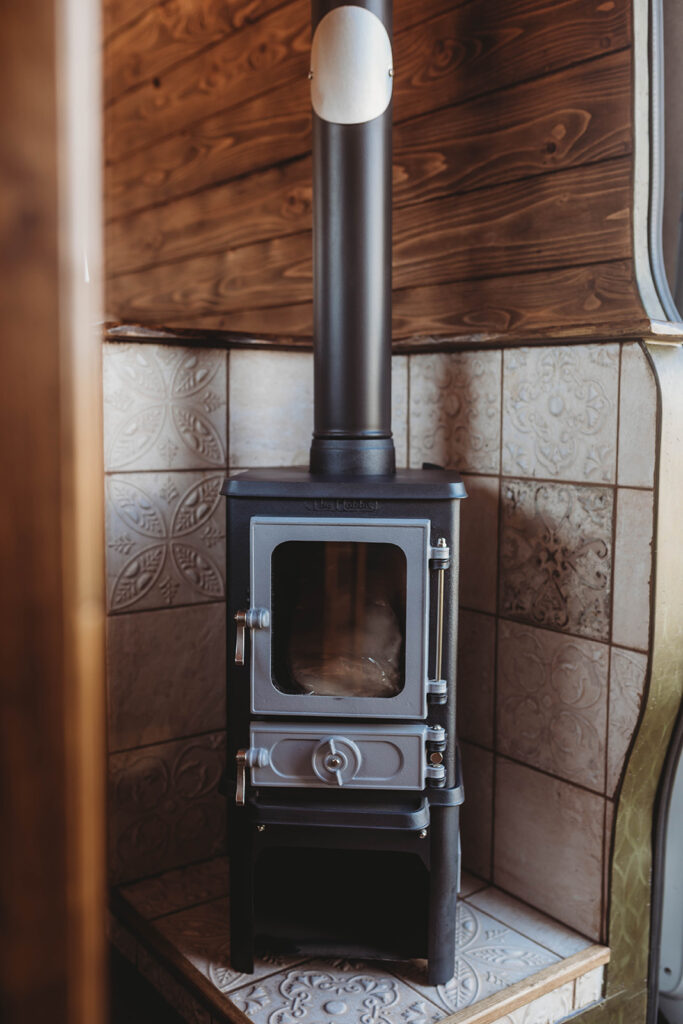
Here you can see that our small wood burning stove is safely bolted to the floor, and we’ve also installed an air vent behind it.
If you’re looking to site your stove on the floor of the van, then you will need to inspect the undercarriage of your vehicle to make sure you do not damage any conduits, exhaust pipes or electrical components when you drill through the floor! You will also need to do this before you cut a hole in the floor of your van for an air vent, which we will cover in the next section of this article. This might mean that you’ll have to fit some sort of platform in order to situate the stove where you want it to be.
Before you bolt the stove down, you’ll also need to consider some sort of hearth. Your hearth will need to be made out of a non-combustible material that’s at least 12mm thick, in order to comply with regulations. However, if you’re installing a small wood stove into a vehicle, then there’s a bit more flexibility with these regulations. Nevertheless, you will still need to have some sort of hearth in case anything falls out of your tiny wood burner when you go to refuel it!
You will need to bolt the stove onto the hearth, but in the video we’ve also showed you how you could use a removable hearth, which can be taken in and out. Either way, you will need to have at least 225mm of space from the front of your stove to the front of your hearth. So you will need to have some sort of hearth in place, whether it’s going to be positioned in front of your stove, or beneath the stove itself.
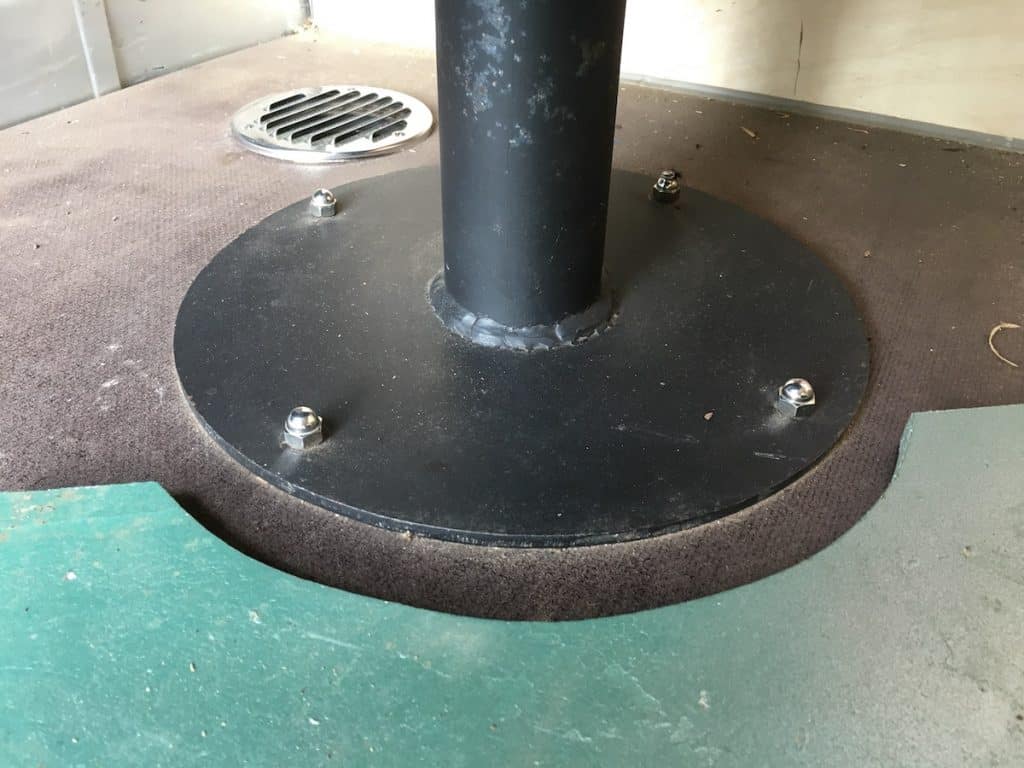
This image shows our removable hearth, which can be taken in and out.
We’ve created a document which will show you how to bolt down your Hobbit stove, and you can find more useful resources in our help section and FAQ! It’s also worth reading our article on how much room you will need to have around a small wood burner.
Installing a small wood stove into a vehicle – ventilation
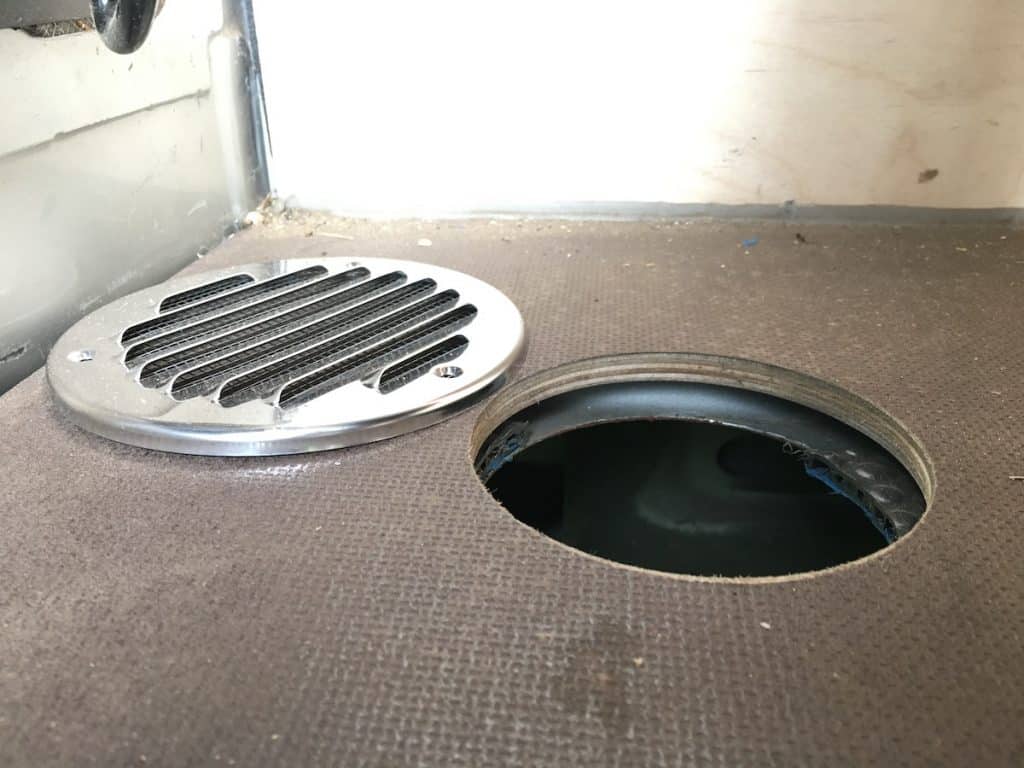
When it comes to installing a small wood stove into a vehicle, another crucial thing you’ll need to consider is how your space is going to be ventilated. In our video, you can see that we’ve cut a 100mm diameter vent hole behind the stove, which has a vent cover fitted on top of it. This is to ensure that there’s a supply of air to the stove. In a sealed van you’ll be in competition with the stove if you don’t put some form of ventilation in, and it’s really no good just relying on opening a window – it’s not good enough. You’ll need to put at least one vent in, and it should be positioned as close as possible to your tiny wood burner!
When you cut the hole for your air vent, you’ll need to make sure that you don’t damage any parts in the undercarriage of your vehicle.
Alternatively, you could connect this air vent directly into your stove if you purchase a Hobbit stove with our direct air option. However, our small wood burning stoves will be able to comfortably heat the space inside your van, so you really don’t need to worry about any cold air entering your vehicle through a vent.
Distances and shielding
After siting your small stove, you will also need to consider how much room you will need to have around a small wood burner. You will have to shield any combustible materials that are near your tiny wood burner, as there’s certain distances that you’ll need to comply with for your safety. If you have any combustible surfaces near your stove (such as the plywood van wall in our video), then your small log burner will need to be positioned at least 400mm away from this type of material from the side and 450mm from the rear. Because space is at a premium in a van, you’ll want to reduce these distances as much as possible!
In order to do this, you could choose to shield the wall, the stove or both, but to site your stove closer to the van wall, you will need to take some form of action. In the above video, you can see that we’ve used an enamel sign with an air gap behind it to shield the plywood wall of the van. You could use vermiculite board or hardiebacker board in a similar way (this can be purchased from sites like Vitcas, for example), and this will mean that your stove can then be positioned 200mm away from your shielded wall.
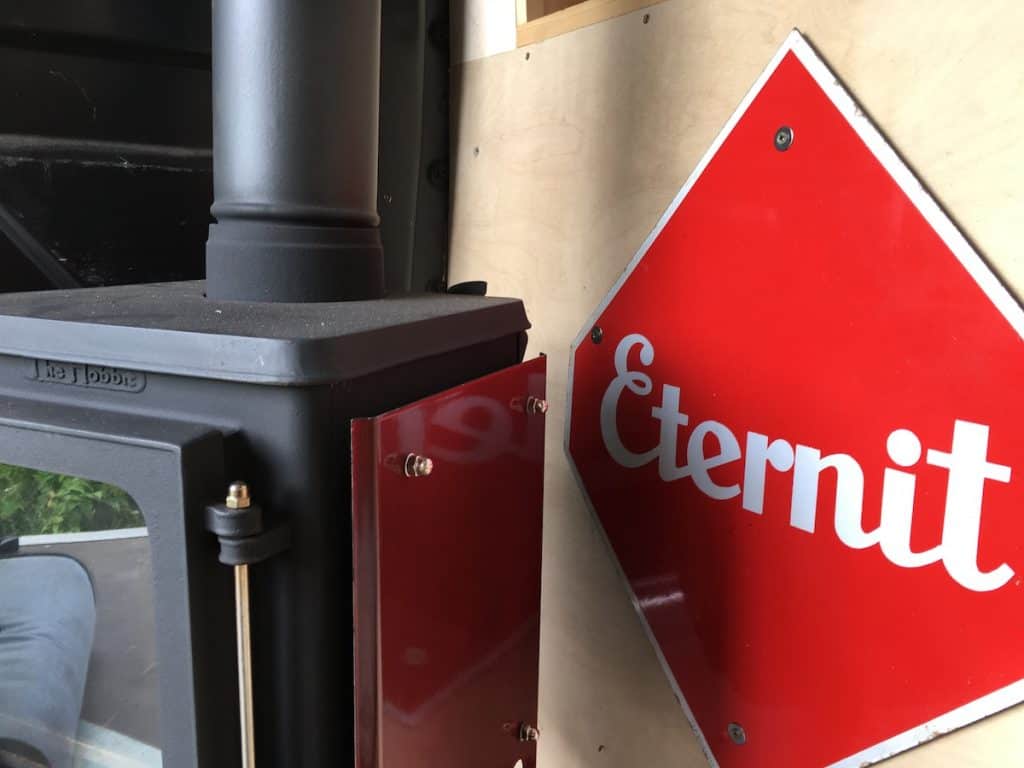
You can also shield the sides or the back your Hobbit stove with our small stove heat shield option, which will enable you to place your stove 150mm from the side to a combustible surface and 100mm from the rear. If you decide to shield your wall and the stove itself, then your tiny wood burner can be positioned just 100mm away from the wall from the sides and rear. This way, you can fit your stove into a much tighter space.
Installing a small wood stove into a vehicle – fitting your flue system
You’ll also need a flue system to run your stove! We’ve designed a wide range of installation kits that are each suited to a variety of different applications. We have designed two different flue kits for campervans, two different flue kits for horsebox conversions, and two different flue kits for tiny homes!
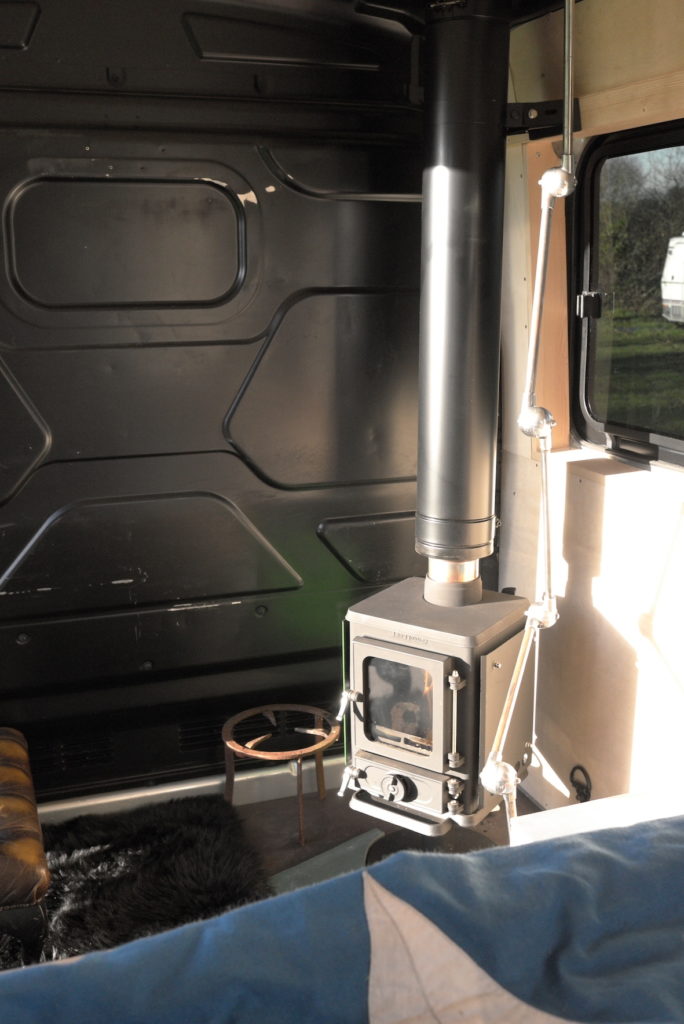
In the video, you can see that our flue system starts in single wall flue, which then transitions into twin wall insulated flue pipes before going out through the roof. After that, the twin wall flue pipes go through a silicone boot roof flashing, before the final component – a rain cap cowl – is fitted. You can click here to read our article and to watch a video on how to fit a silicone roof flashing.
So, after positioning the stove where you would like it to be (and checking that this is compatible with the undercarriage of your vehicle), you can then use a plumb line to denote the centre of the hole that you will need to cut into the roof of your van. For example, if you hold a piece of string with a weight at the end, and position the weight in the centre of the stove collar, then this will show you where the centre of the hole is that you will need to cut into the ceiling of your van. After you’ve marked out where the hole will be, you can then begin to cut it out of the roof. In the video, we’ve shown you how we removed a section of the roof of the van before cutting a hole in it.
Your twin wall flue parts will exit through the hole in the roof, but you will need at least 50mm of space between your twin wall flue pipes and the edge of the hole in the roof. This gap can be covered up by using the trim plate which is included in our installation kits! In our vehicle, the twin wall flue parts come down onto a 1000mm and a 250mm length of single wall flue, which then connects into the stove itself.
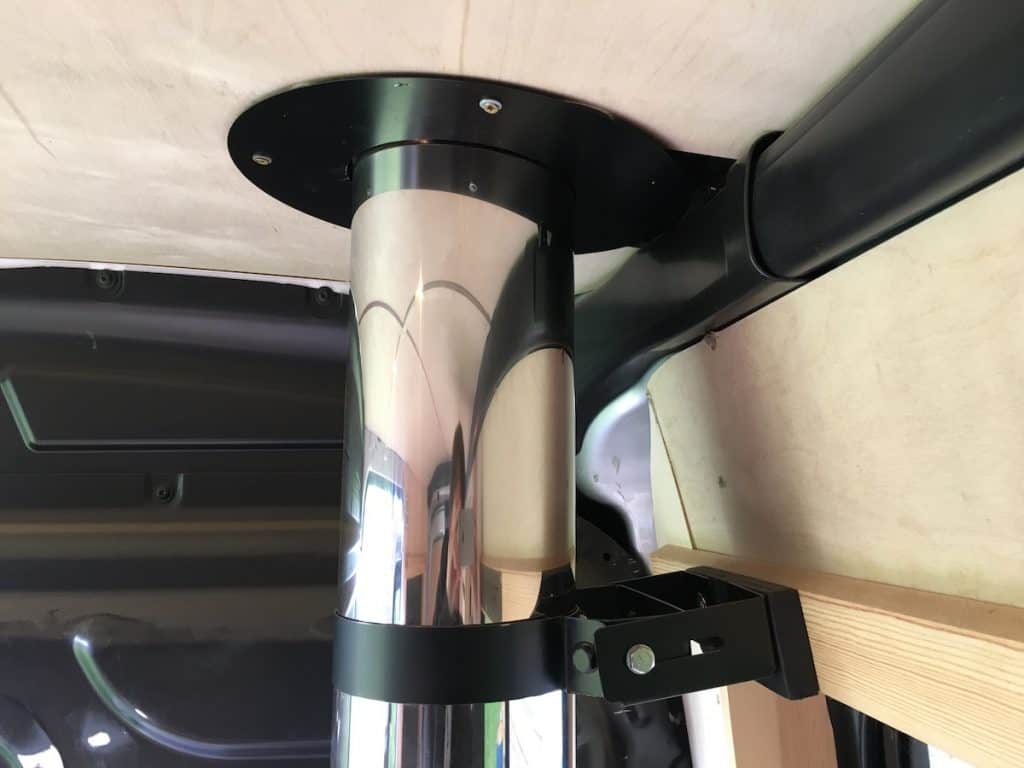
This picture shows how we’ve fitted the trim plate and the wall support.
If you’ve parked your van up somewhere for a couple of weeks, then you can add the extra length of flue that’s included in our van installation kits to improve the draw of your flue system. You obviously can’t use this when you’re driving around because it will be sticking up too high, but if you’re parked up for any length of time, then adding an extra length of flue pipe will make a great improvement to the draw of your flue system!
Our flue system is supported by a wall band, which is mounted onto the side of the van. This ensures that everything is absolutely rock solid, which is what you want. You don’t want any movement at all, because if your flue kit gets bumped or if you hit the curb, for example, then you could shake things loose.
Fitting a carbon monoxide alarm
As a final step, you’ll want to make sure that you have a carbon monoxide alarm fitted near your small wood burning stove. Having a carbon monoxide alarm (or even better, one with a built-in smoke alarm), will mean that you’re sure to wake up if anything blocks your flue pipe, for example.
If you consider the few basic points in this article, then there’s no reason you should have any problems when it comes to installing a small wood stove into a camper van, van or RV! If you have any other questions, or would like more advice about installing a small wood stove into a vehicle, then please feel free to contact us!

