Installing A Small Wood Burning Stove Into A Van.
Are you thinking of installing a small wood-burning stove into a van? If so, then this article will give you all of the important information that you’ll need to consider, as well as some useful tips!
We also met up with Matt Simms, from the Motorhome Matt Podcast, where Mark discussed everything that you will need to consider before you install a small wood burning stove into your campervan, motorhome, or other form of tiny home. You can click here to listen to the podcast!
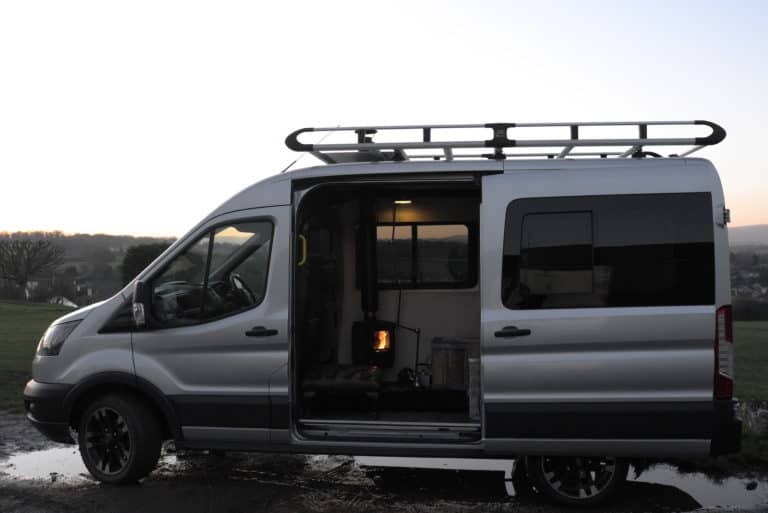
Converting a works vehicle into a campervan or a tiny home has become a popular choice, and installing a small wood stove into your vehicle will give it a much more homely feel! Whether you’re living in your van full-time or if you just use it for trips to the beach, either way, installing a tiny wood stove in your van will enable you to stay warm and cosy all year round! You could even use the warmth of your fire for some stovetop cooking!
Many people wish to incorporate a small wood-burning stove into the layout of their van, but there are certain factors that you will need to consider:
- The position of the stove and the flue pipes
- Safe distances to combustible and non-combustible materials
- Installing an air vent
Where should I install a small wood stove in my van?
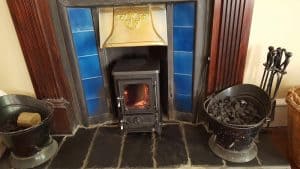
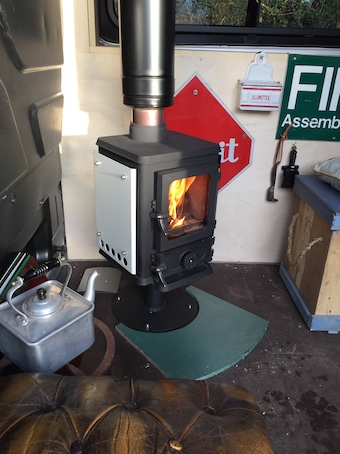
It’s a great idea to position your stove at an angle in a corner, as this means that your stove can be seen from both the bed and the doorway. This is also a very efficient use of space!
One of the first things to consider is the fact that your stove will need to be securely bolted down to the floor of your van.
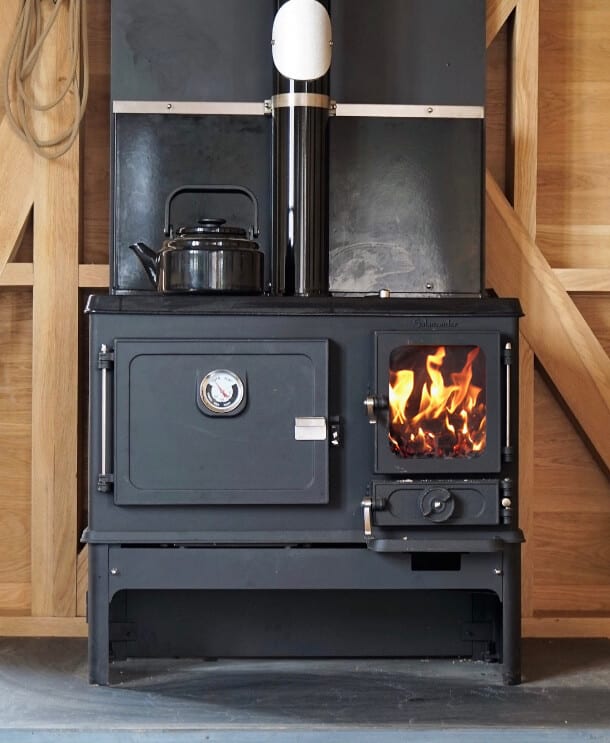
Our Hobbit stove has 4 little feet, and each foot has a pre-drilled hole where the stove can be bolted down. This makes our small wood burning stove easy to install into campervans, canal boats, tiny homes, or any other moving vehicles! If you want your Hobbit stove to sit on our log store stand, then there’s also a hole in each corner of the stand, so that you can easily secure the stand to the base of your vehicle. This document will show you how to bolt your Hobbit stove to the floor.
Bolting your stove to the floor can prove awkward if the chosen position interferes with the wiring loom, the exhaust system or the fuel tank of your vehicle, so you will need to carefully inspect the underside of your van to see which areas you will need to avoid. In our 2017 Transit, the best area with no obstructions is behind the bulk head of the vehicle, on the driver’s side. Siting the stove on the driver’s side brings us to the second factor – the position of your flue pipes.
The position of your flue pipes will also need to be considered, as it is best to avoid cutting through any cross members. The hole in your roof will also need to be in a suitable place where you can easily fit your roof flashing.

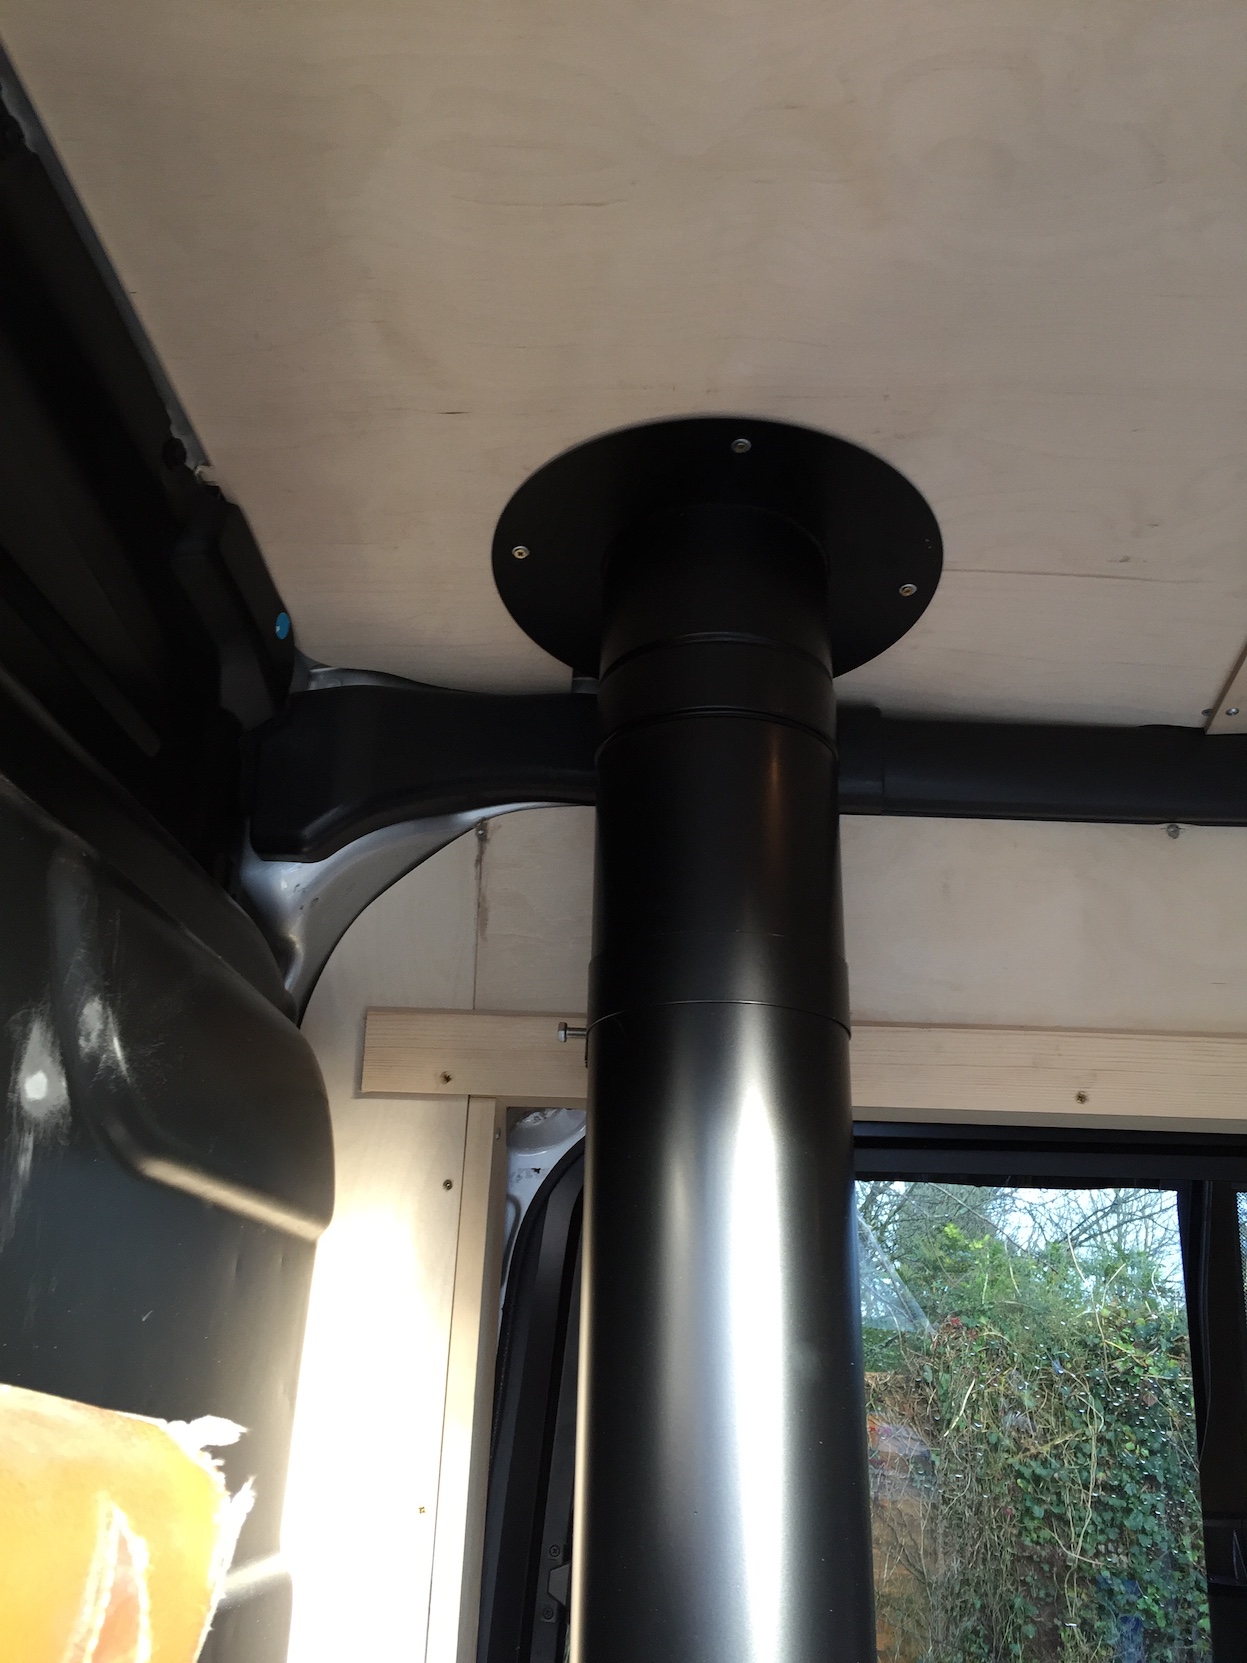
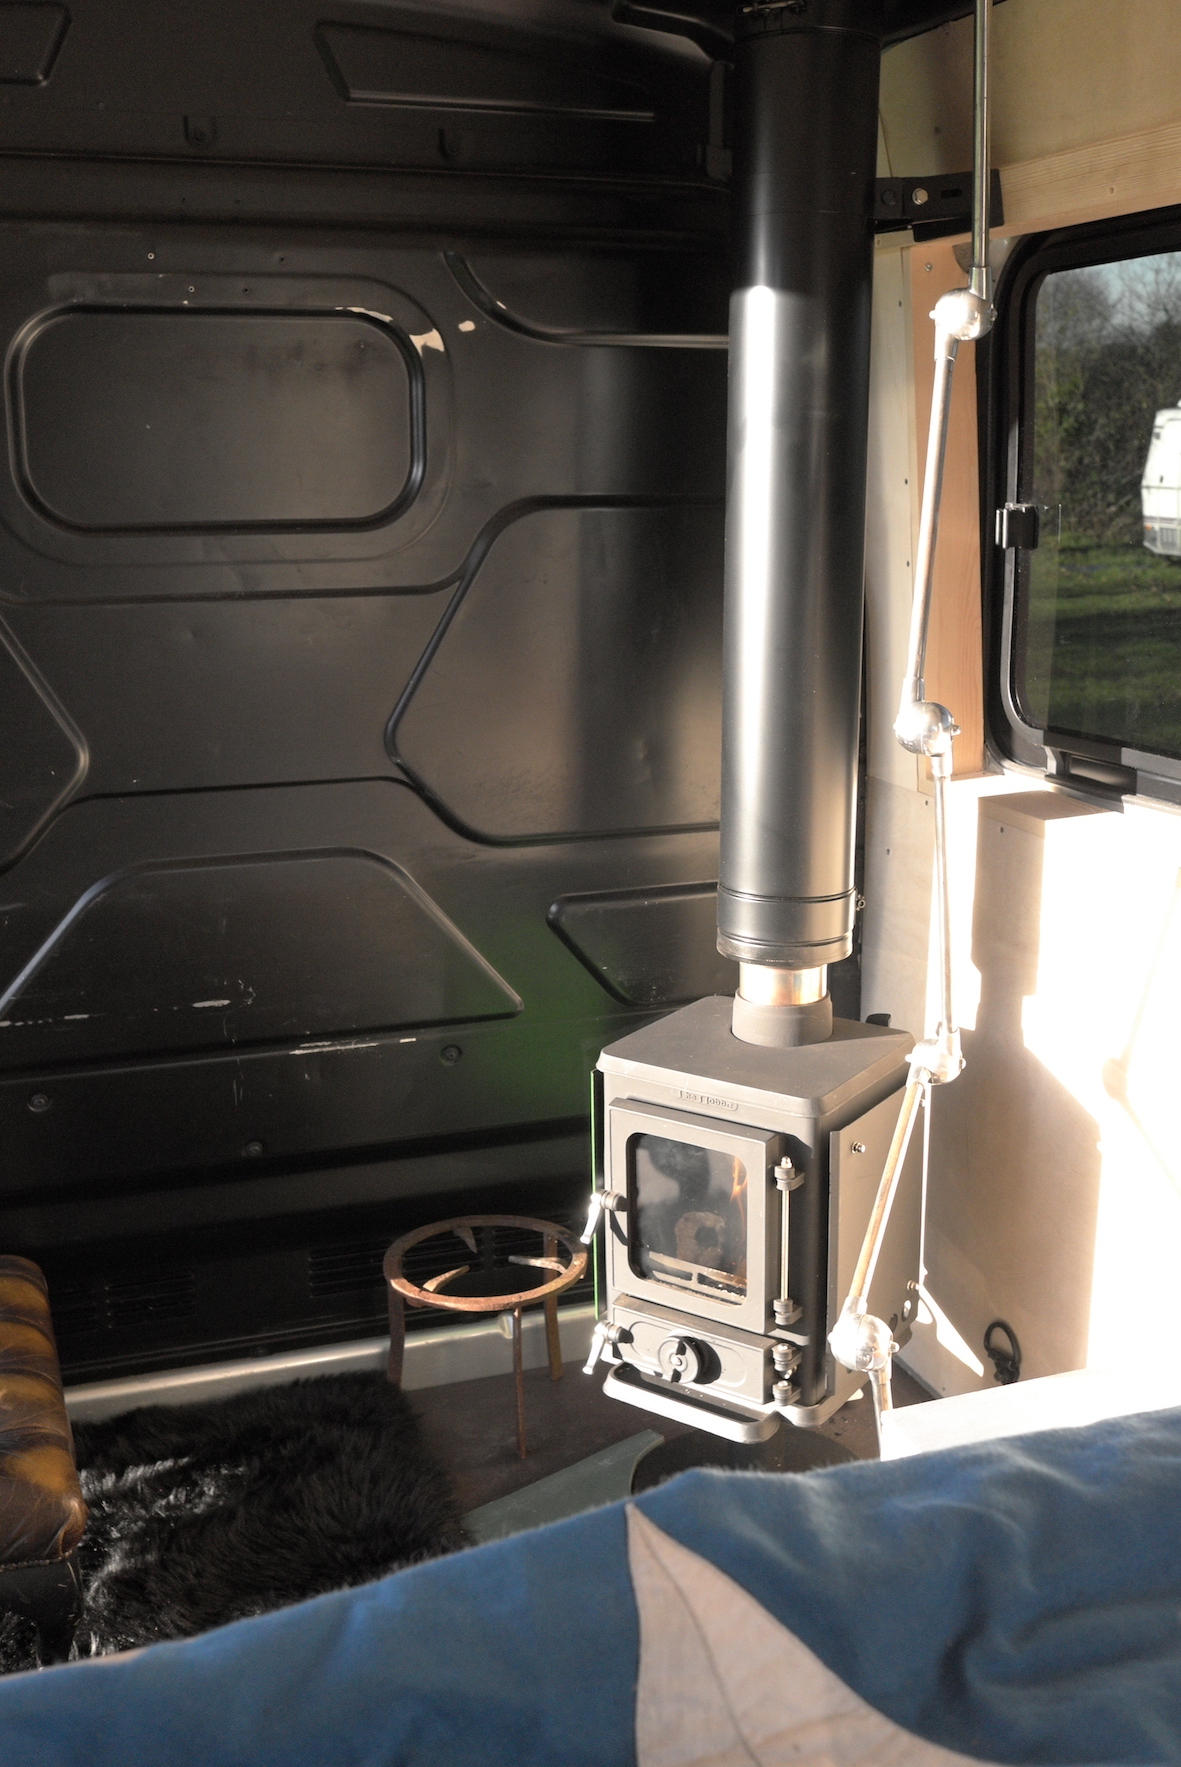
Here, you can see how our flue pipes exit out through the roof of the van.
If you’re going to be driving down any lanes with overhanging branches, then it’s best if you can install your stove and flue kit on the driver’s side on the van. This way, your rain cap will be further away from the side of the hedge (providing that you’re driving in the UK/on the left hand-side of the road), so this means it’s a lot less likely to get knocked off.
We’ve designed two different flue kits for installing your stove into a van, and our flue systems include a closure cap, which you can swap over with the rain cap when your stove is not in use. This seals off your flue system and reduces its height, making it much less likely to get damaged when you’re in transit.
How close can I put my stove and flue pipes to combustible and non-combustible materials?
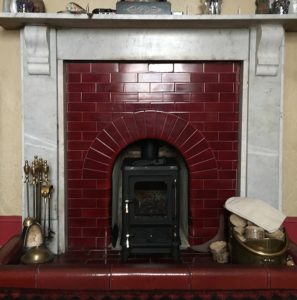
Your stove will have been tested to calculate the safe distances that it will need to be situated away from any wood or upholstery etc. Our Hobbit stove needs to be positioned at least 400mm away from combustible surfaces, and at least 200mm away from non-combustible surfaces, but in this setup, we’ve added our heat shield option to the stove. Our heat shield option is extremely useful if you’re looking to install your tiny wood burner into a particularly small space. You can view this document to see the new clearances for the Eco Design version of our Hobbit stove, with and without heat shields.
Plus, these distances are measured from the body of the stove itself, rather than being measured from the heat shields! The heat shields can also be painted in a wide range of colours to match the appearance of your small wood burning stove.

If required, the combustible surfaces can also be shielded, which then allows you to have just 100mm of space at either side of your Hobbit stove if it’s equipped with our heat shield option. You could shield these surfaces with vermiculite board or hardie-backer board, which are just two types of insulation that can be attached. You can source vermiculite fireproof boarding from Vitcas, but it’s worth bearing in mind that you should have a 12mm air gap behind these boards as a minimum.
Your flue pipes will also need to be positioned a safe distance away from anything combustible. Regulations currently state that single wall flue pipes should be at least 3 times their diameter away from any combustible materials, and 1.5 times their diameter away from non-combustible materials. For example, 100mm/4″ single wall flue pipes will need to be 300mm away from combustibles and 150mm away from non-combustible materials.
On the other hand, twin wall insulated flue pipes can be positioned just 50mm away from combustible surfaces. Although these components are a lot more expensive than single wall parts, they might be worth considering if you’re especially tight on space. If your flue pipes need to navigate around certain obstacles in your cabin, then we also offer a custom off set kit to help solve this problem!
Where should I install an air vent in my campervan?
Vans are very air tight spaces, so it’s crucial that you install an air vent. This will ensure that there is a good supply of air in order for your stove to function properly, and you do not want to be in competition with your stove for the available air in the van if there’s no fresh air coming in! It’s simply not enough to just think that you can open a window from time to time, so you will need to fit an air vent as close to the stove as possible.
Here, we were able to cut a hole in the floor of the van just behind the stove. Before cutting a hole, you will need to inspect the undercarriage of your vehicle to make sure you’re not going to damage any wiring, the exhaust system, or the fuel tank!
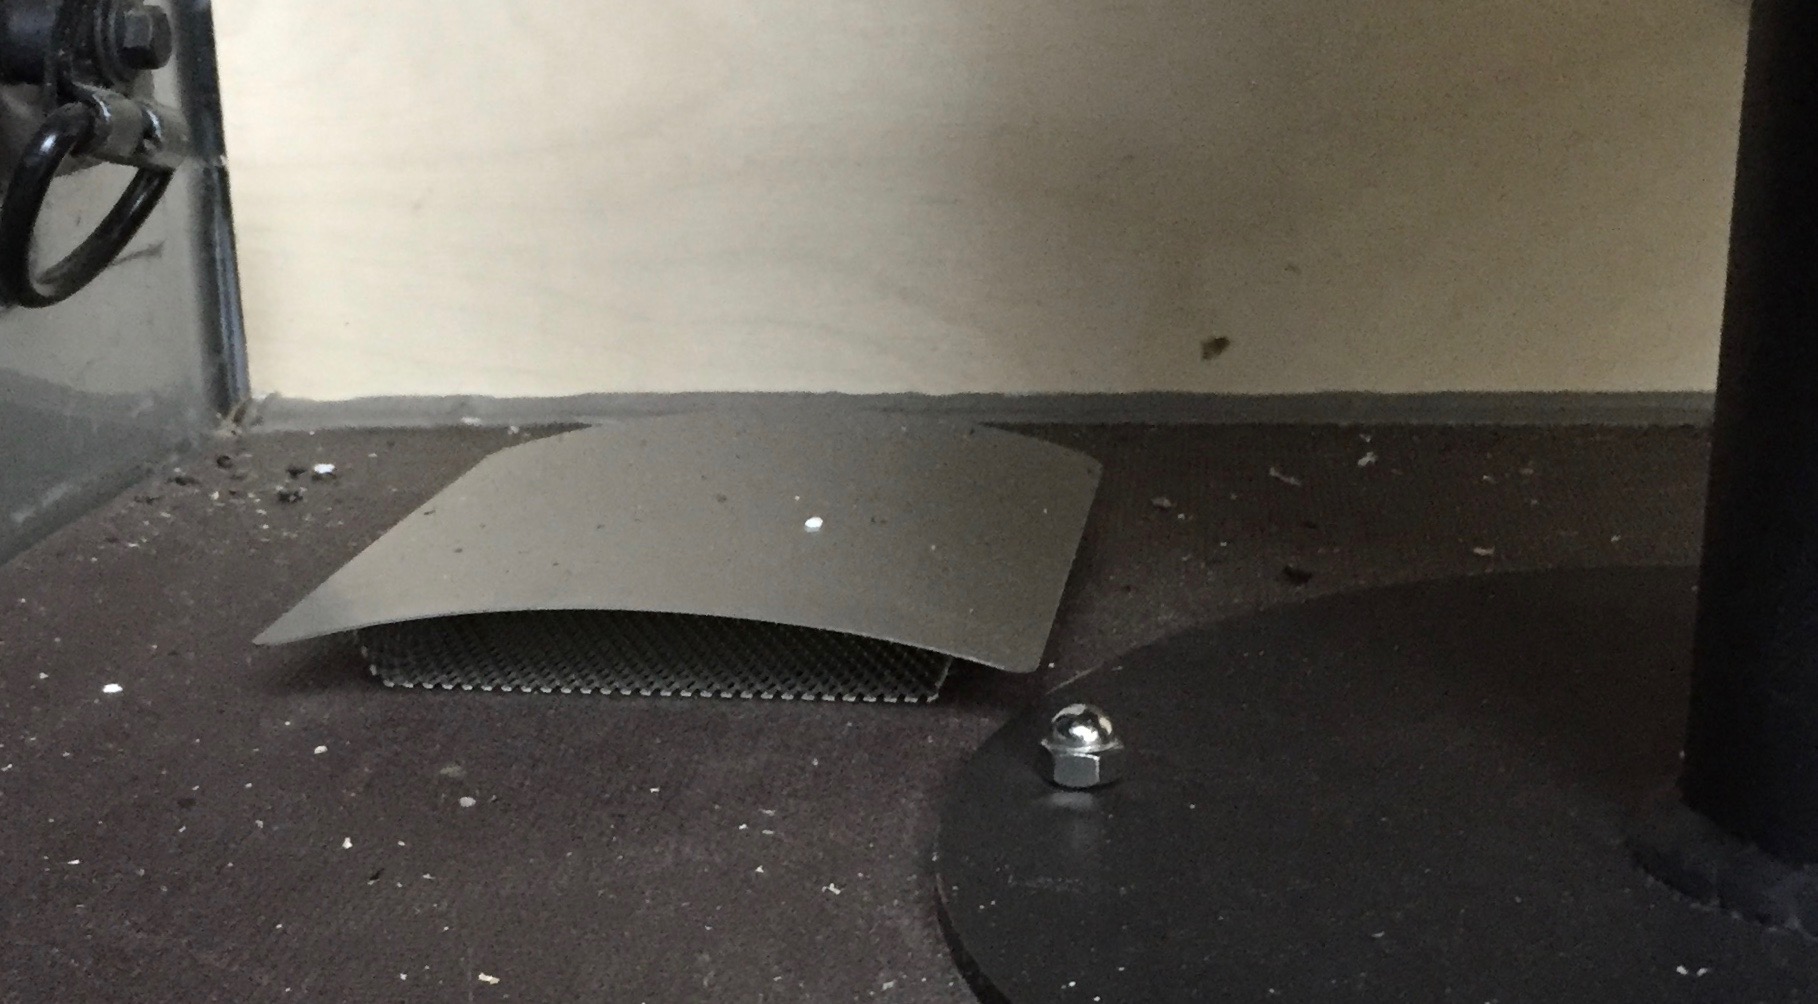
Fitting an air vent is essential
It’s also essential that you have a fire extinguisher and a smoke and carbon monoxide alarm fitted inside your van. There are two links below where you can purchase these:
A brief overview of how to install a small wood burning stove into your van.
When you are happy with the positioning of your stove, it will need to be bolted down. The trickiest job is then cutting a hole in the roof of the van.
You don’t need many tools when it comes to installing a small wood stove into your van. Cutting a hole in the roof of your vehicle for the twin wall flue pipes to exit through can be done in a number of ways – a jigsaw, 4.5″ angle grinder, or a steel nibbler will all do the job.
A spirit level, tape measure, marker pen and plumb line are all helpful too.
The best tool we could find for cutting the hole was a steel nibbler attachment for a drill. This also came with a pivoting arm, and in combination with a right angle drill, this cut a perfect 150mm hole. We spent £25.00 on a nibbler drill attachment, which produced a neat and accurate hole, and we used a 100mm diameter hole saw for cutting the hole for the air vent.
Using some flue pipe, a tape measure, and a plumb line, you will need to transpose the centre of the flue outlet of the stove to a point on the van roof. Next, drill a pilot hole, and then you can go outside and clamber onto the roof to mark the circle.
The hole in the metal roof of the van needs to be as close-fitting to the twin wall flue pipe as possible, so that it can be sealed with heat resistant silicone to provide an additional barrier beneath the flashing itself.
When using 100mm twin wall flue you will need to cut a 150mm hole. Any combustible materials such as a plywood headlining and insulation needs to be cut back 50mm away from the flue pipe. The internal hole through the lining would therefore be 250mm. This larger hole is covered by the trim plate.
We strongly recommend that you use twin wall insulated flue pipe for exiting the van, as it will be adjacent to combustibles. To add to this, the external insulated flue pipes will retain the flue gas temperature, and this will maintain a good draw and reduce the chance of deposits forming.
With the hole cut, the first 1m length of flue that attaches to the stove can be positioned to allow for the fixing of the support bracket. Leave the bolts loosely fitting until the top section of flue is in place and when the flashing has been fitted.
The flashing can be positioned with the top section of flue coming through it. A bead of silicone can then be laid 2cm from the edge of the flashing base and the flashing positioned. A socket attachment on a battery driver can then be used to drive in the self drilling & tapping fixing screws that also come with plastic caps. These need to be placed around 50mm apart. We’ve also added a storm collar above the silicone flashing for added weather protection, and to help protect the flashing from UV degradation. This also comes in a black powder coated finish, so it really looks the part!
After you’ve tightened the support bracket bolts, you’re ready for your first fire! This will cure the painted finish on the stove, so it should be done with the van fully ventilated, as the paint will smell a bit as it starts to cure. To prevent the paint from bubbling, it’s best to have a series of small fires to begin with. You can start by burning some firelighters and a few bits of kindling, being sure to let each fire go out and allowing the stove to cool down before you light another, slightly larger fire. More advice on this can be found here.
Here, our Hobbit stove has been installed using a Midtherm HT-S 100mm twin wall flue system, and we’ve used the following components:
- 100mm single wall to 100mm twin wall appliance connector.
- 1 metre of 100mm twin wall flue.
- 500mm of 100mm twin wall flue.
- A flat, round trim plate.
- Wall support and extension kit.
- Silicone flashing and fixing kit.
- A storm collar.
- Rain cap.
We also have a closure cap for use on longer journeys. The rain cap can be easily removed with the locking band system, before adding the closure cap in its place.
We’ve made a newer version of this article about how to install a small wood stove in a van. Here, you can also find a video that we’ve made, which should help guide you through your installation.
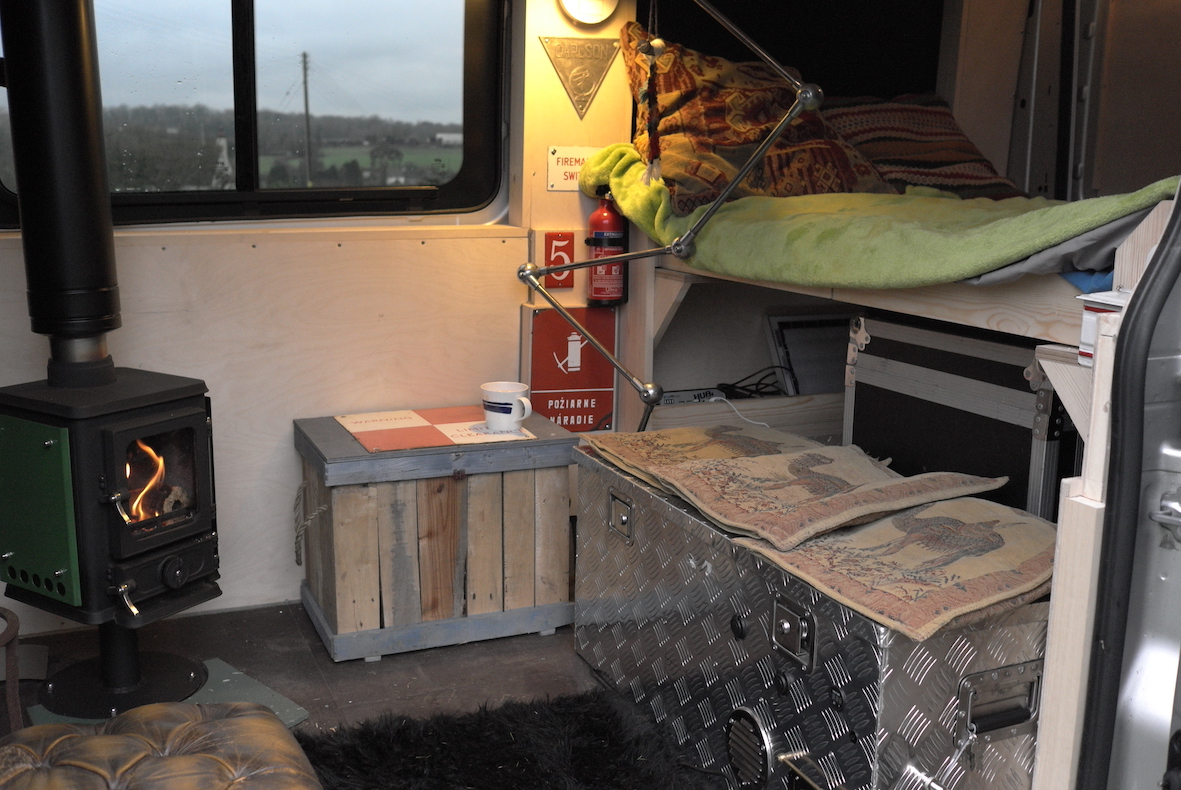
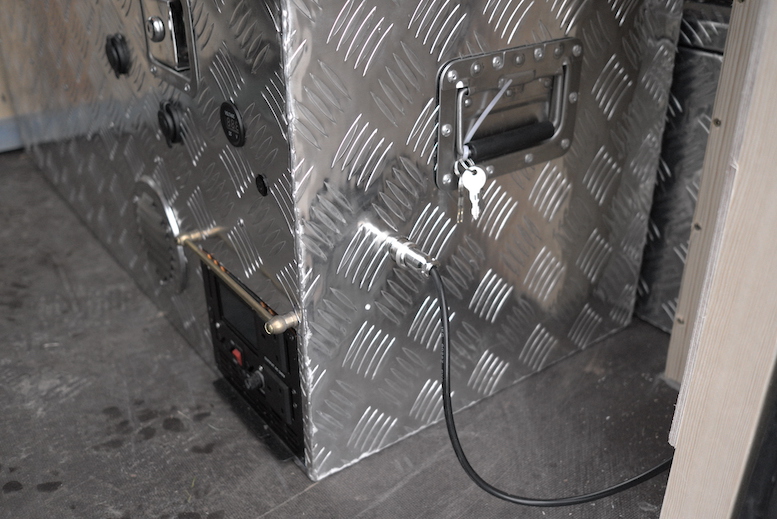
The concept for our camper van conversion was to make a work van/camper van setup. Apart from the stove itself, the van can be fully emptied, so that it can be used as a works vehicle. To enable all of the normal camper van facilities to be removed when the van is being used for work, I employed the services of GW AutoElectrics. Giles from GW turned an £80 metal tool box into a module which can be charged from a roof top solar panel, which supplies all the 12v and 240v electrical needs.
First, we started with a good strong box. This one has air rams which are great for ease of opening. Next, all of the electrics, the gas cooker, and a gas bottle were fitted inside. The box just hooks up to the solar panel installed on the roof.
Here are some details of the components we used:
450 US PRO ALUMINIUM CHEQUER PLATE JOB SITE BOX TOOL BOX TRUCK STORAGE Large
(163383922690)
On the bottom layer of the box is the electrical set up.
Mounted in the box is a 6000W Peak/ 3000W power inverter:
6000W PEAK/3000W DC12V INTELLIGENT MODIFIED SINE WAVE POWER INVERTER LCD DISPLAY
(192696374945)
Alongside this is a lithium leisure battery:
LiFOS 68 Lithium Leisure Battery Advanced Lightweight 68Ah
(273836223788)
This leisure battery can also be charged from the mains, which means it can be fully charged before each trip.
NOCO G7200 UK 12V / 24V 7.2A Leisure Battery Charger for Deep Cycle Batteries
(202434001889)
The two burner cooker, water bottle shower module, and the solar controller are on the top layer of the box. These are fed from the gas bottle, which is fitted on the bottom layer.
The box is charged via a solar panel which has been mounted onto the roof rack.
Ford Transit MWB Med Roof L2 H2 2014+ Van Guard ULTI Rack Aluminium Roof Rack
(161422422917)
To access the rack we fitted a rear door ladder:
Ford Transit Rear Door Ladder – 7 Rung fits Medium H2 + High H3 Roof Vans (DL)
(302590055311)
With two cushions on the top the box, it also makes a great seat next to the stove! This box simply plugs into a solar panel that’s been mounted onto the roof rack.
Solar power supply:
Permanent solar power supply via roof top flexible 80W panel. Feeding a battery and running a 3000W inverter. Double internal socket cab end. Single socket rear end. 12V socket.
Solar power – removable 20W kit with 3 lights 2 USB ports.
Total power – 100W
Kit purchased from https://www.thecampercoshop.com/brands/hubi?cat=30
Review from gadget viper – https://gadgetviper.com/hubi-portable-solar-panel-system/
Make sure you also checkout our case studies section to see our small wood stove installed in a range of other people’s vans!
FAQ’s
Can I install a small wood stove into my van, RV, caravan, or a boat?
Yes! Providing that you follow the same basic principles that should be adhered to when installing any solid fuel appliance. The setting is a little different from a house, but the principles of Approved Document J of the building regulations should be followed. A useful document and graphic which takes this document and applies it to boats is BS 8511:2010.
Whilst the height of 4.5m for the flue is not obtainable, the flue must be sufficiently high enough to promote an effective draw and evacuation of the burnt gases. We would recommend having at least 1.8m of twin wall flue above the roof of your shepherd’s hut, for example.
The stove will also need to be situated on a hearth that’s made from a non-combustible material which is at least 12mm thick. The hearth will also need to extend beyond the front of the stove by at least 225mm, just in case a hot ember rolls out of the stove when you open the door, for example.
Can you put a stove in any size van?
Installing a small wood stove into a van will take up space, and if your van is well-insulated, then a stove will heat the space very quickly. Not all vans are suitable for a wood stove – in a small van you may never be able to run the stove at its optimum output, and this could lead to a build-up of unwanted deposits in the flue and the stove itself. We would say that only a medium wheel base van or larger are suited to a small wood burning stove.
How much space will a stove take up?
The stove will take up a fair amount of space in your van, so combustible surfaces adjacent to the stove can be shielded to reduce the safe distances. You can also install the stove in a corner like we’ve done, which reduces the footprint. An area of approximately 600mm square should be sufficient.
Do I need a hearth for the stove?
Yes, a hearth needs to extend 225mm from the door forwards. It needs to be from a non-combustible material which is at least 12mm thick. You could use a piece of glass, slate, concrete, or a patio slab, for example.
What type of flashing do I need for installing a small wood stove in a van?
The best type of flashing for this sort of installation is a silicone boot flashing. It has a malleable aluminium edge to adapt to the profile of the metal roof, and it comes with some self-tapping screws. The flashing can be easily cut to size, so it grips the pipe securely, maintaining a water tight seal around the pipe, whilst still having a bit of flexibility to absorb any bumps in the road. We’ve written this article which will take you through each step of fitting a silicone roof flashing.
Does the stove need to be bolted down?
Most certainly yes, and in a minimum of four positions if possible. In the event of an accident you must be certain that the stove will not break free of its moorings and launch forward towards the driver and passenger. Ideally the stove should be bolted through the floor of the van itself, rather than having it bolted to a raised wooden platform, for example.
Do I need an air vent?
As a van is a fairly airtight box, then fitting an air supply for the stove is an essential requirement. We would recommend installing at least one 100mm diameter vent as close to the stove as possible.
What is the best small wood stove for a van?
There are a few out there, but we think that our little Hobbit stove, is the best small wood stove for a van! As long as you can bolt your stove down and vent it properly, then there are a few to choose from. The smaller the van, the smaller the stove. It’s best not to go for a bigger stove than what you need, else you will never be able to run it properly!
However, really tiny stoves can have a limited burn time, or do not have a view of the fire. We would recommend chooseing a cast iron stove over a steel stove, as it will remain much warmer for much longer, even after the fire has burned down. In general, cast iron is a much better material for radiating and retaining the heat from your fuel.
Do I need a certificated small wood stove for my van?
Strictly speaking, no, but we think it’s definitely worth getting a certificated appliance for peace of mind. With an uncertificated stove, you will not know the safe distances to combustibles, as the stove will have never been officially tested.
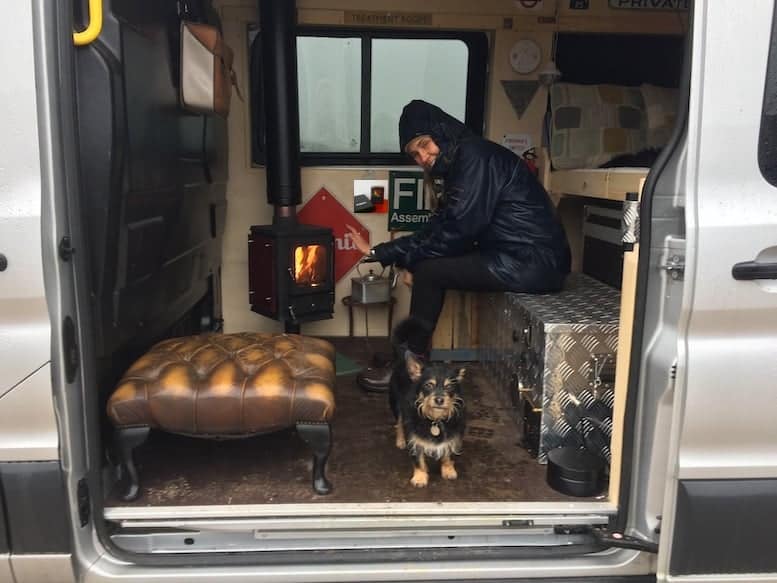
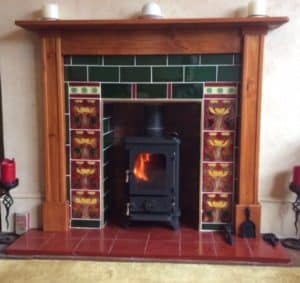
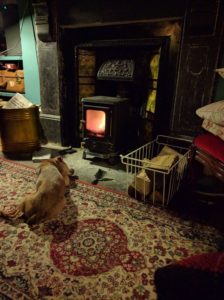
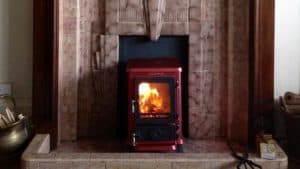
Gill and Scampi warming up in front of the Hobbit stove after a walk in the rain!