Maintaining Your Small Wood Stove Over Summer.
This article will explain how you should go about maintaining your small wood stove over summer. This is a very simple process that every stove owner should consider – not only will this increase the lifespan of your appliance, but it will also improve the safety, efficiency, and the performance of your small wood burning stove!
It’s great to see that the weather has picked up recently, and now we can enjoy some hot sunny days throughout the summer! However, this means that you’ll need to think about shutting down your small wood stove for the rest of the season, as you probably won’t need to use it as often.
Summer is the perfect season for maintaining your small wood stove, and there’s a number of things that you can do to keep your stove in tip-top condition! This time of year is also ideal for carrying out any repairs, so that your stove and flue system are in great working order for whenever they need to be used again.
In this article, we’ll give you plenty of advice on maintaining your small wood stove over the coming months. Towards the end of this page, we’ll also show you a few different ways of how you can still use your stove throughout the summer!
We offer lots of products for maintaining your small wood stove, which are perfect for our Hobbit stove and our stove cooking range. You can visit our spares and maintenance section for the full list of products.
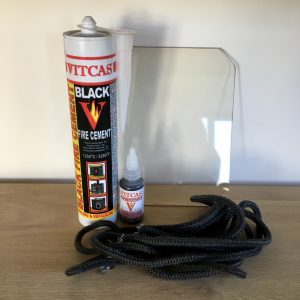
Our rope adhesive, fire cement, and heatproof silicone sealant are all proudly manufactured by Vitcas.
Cleaning The Appliance
Before you can take a closer look at the condition of your small wood burning stove or your stove cooking range, you will need to give the appliance a good clean.
This section acts as a quick guide to cleaning your Hobbit stove or your Little Range Cook Stove, but the full details and warnings are provided in the instruction manual that’s included with each appliance.
Please note: only ever attempt to clean your stove when it is completely cool to the touch. You will need to ensure that the fire has completely stopped burning for quite some time.
1) Cleaning The Outside Of Your Small Wood Burning Stove
Start by wiping down the main body of the stove and the top and bottom doors with a clean dry cloth, or a feather duster. Make sure you only use a soft cloth that will not cause any abrasion to the appliance. It’s also a good idea to use a cloth that’s machine washable, as the stove could mark the cloth, especially if it has been painted.
Once your small wood burning stove is dust-free, you can gently wipe it down with a damp cloth to remove any light marks or stains. Whilst you’re at it, you may as well dust and wipe your hearth and the rest of the recess, so that your fireplace is left looking clean and tidy!
If there are more permanent marks on the appliance that you wish to remove, then you might need to repaint your stove with some high temperature Calfire stove paint.
2) Cleaning The Glass Window Of Your Small Wood Burning Stove
Now you can move onto the glass! The best way to clean the glass window of your wood burning stove is to use a piece of newspaper, or a tissue.
Give it a quick dab in some clean water to get it slightly wet. Next, lightly dip the newspaper into the cool ashes of your fire before gently rubbing it against the glass, taking care not to scratch it. If necessary, you can wipe away any smears with a damp tissue and dry the glass with a soft clean cloth.
If you have some particularly stubborn build-ups on the glass that need removing, then you swivel the clips at each corner of the window to remove the glass from the door. If the clips are stuck in place due to build-ups of soot, then you can apply a small amount of WD40 and give them a light tap to get them moving again. You can then lay the glass on a flat surface to give it a good scrub, and you can also use some glass cleaner if the pane is especially dirty!
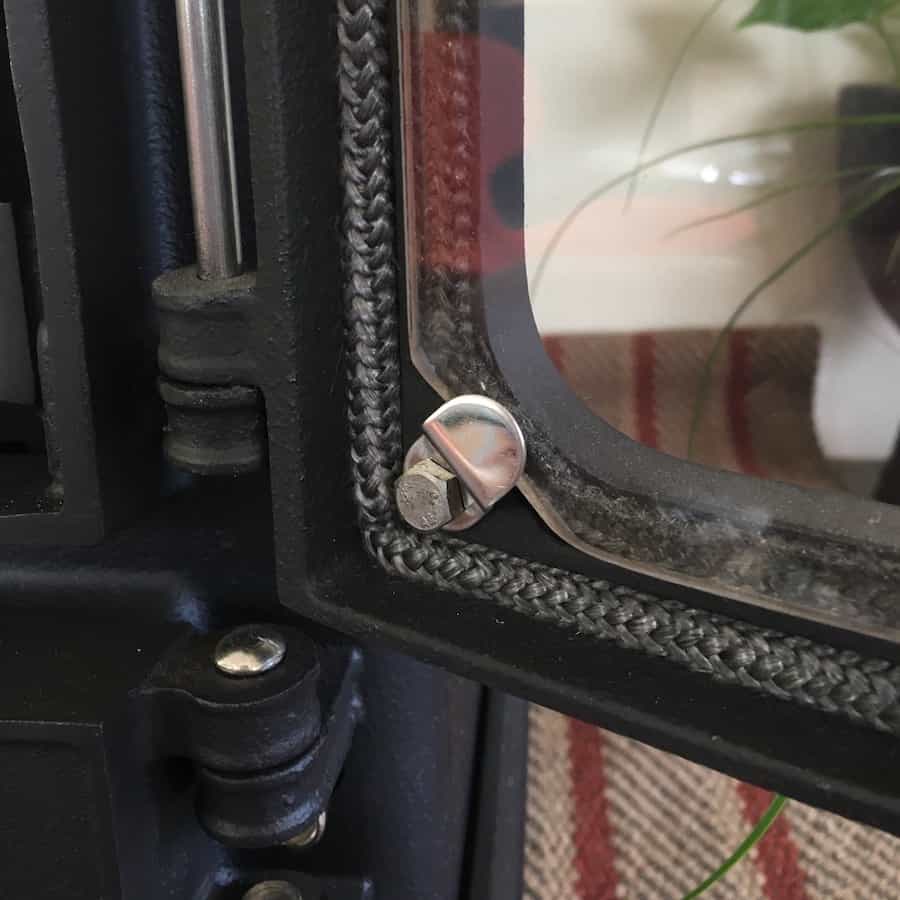
The glass window can be easily removed from the Hobbit stove
3) Cleaning The Inside Of Your Small Wood Burning Stove
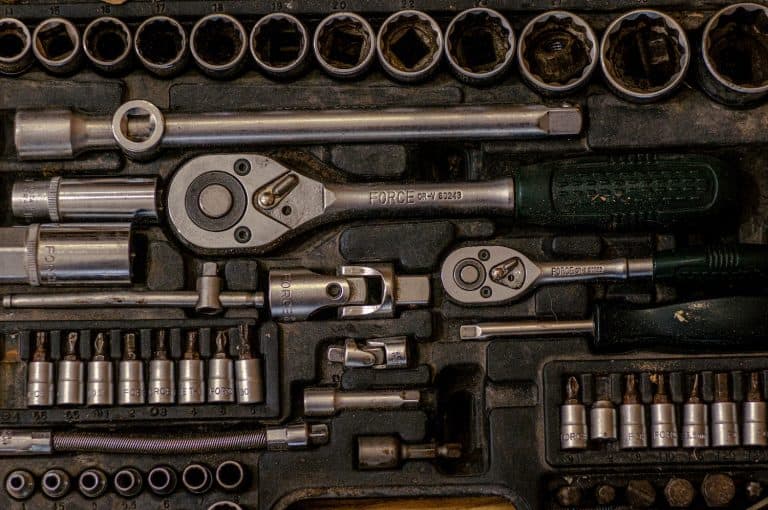
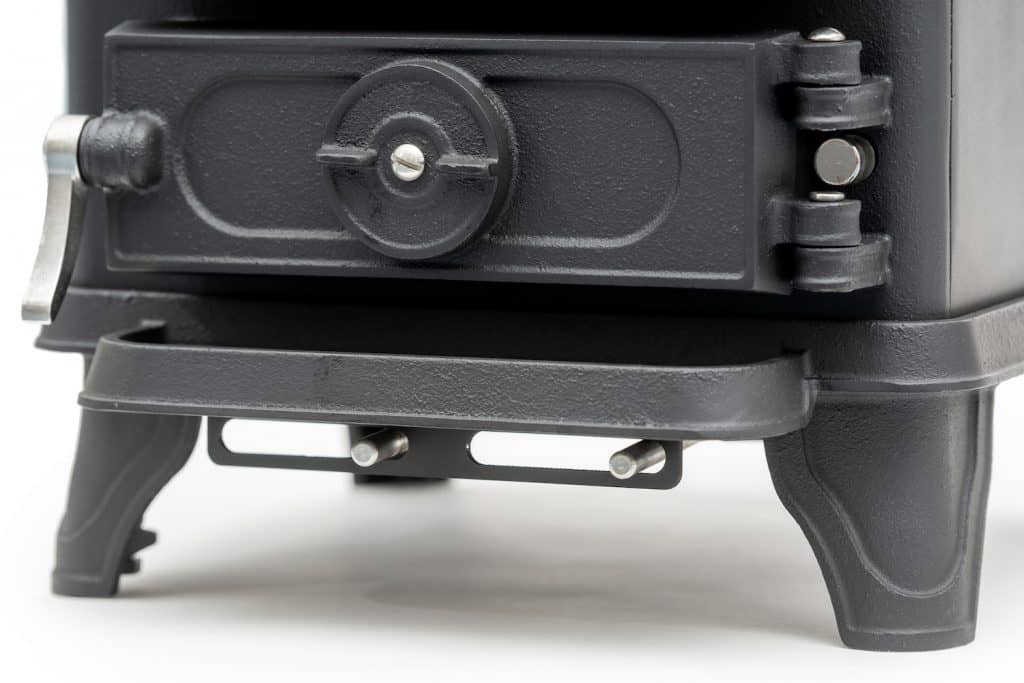
Start by riddling the stove. This can be done by using the Salamander multi-tool to operate the riddling control, which located between the two pins on the right-hand side of the bottom door. Every Hobbit stove and Little Range comes with a multi-tool included as standard.
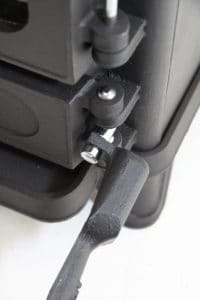
Riddling The Hobbit Stove
Once you’ve locked the multi-tool in place, gently push and pull the riddling arm forwards and backwards a good few times. This will turn the centre grate, causing any small deposits in the firebox to fall through the grate and into the ash pan. You can use the other end of the Salamander multi-tool to remove the ash pan before emptying the contents into your waste bin, or into your garden (ash is great for the soil!).
Warning: Only ever do this when the fire has completely gone out. Your small wood burning stove and the ashes themselves will need to be completely cool, else you risk starting a fire.
Every Hobbit stove and Little Range comes with a centre grate and an ash pan included as standard.
Next, vacuum inside the stove and behind the doors to get your small wood stove looking spotless! It’s a good idea to remove all of the ash before the stove is left over summer, as ash can be corrosive if it’s left over time.
Inspecting The Appliance
The most important step when maintaining your small wood stove is to make sure that the appliance has been carefully inspected, and any repairs have been carried out before you fire up your stove again once summer is over.
Now that your stove is nice and clean, you will be able to identify any issues quickly and easily. Inspecting your small wood burning stove will ensure that the appliance is ready and raring to go as soon as the evenings draw in and the days begin to get cooler.
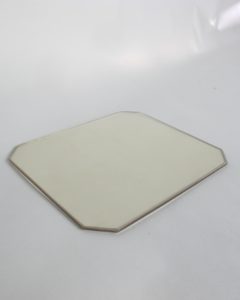
1) Start by taking a close look at the glass window of your Hobbit stove, or your Little Range. The glass can get damaged over time if you have fired your stove too vigorously, or if your fuel has come into contact with the glass window, for example. If there are any cracks or scratches, then it’s a good idea to order a replacement piece of glass so that the stove is safe to operate.
2) Check the fire rope seals behind the top and bottom doors of your stove. There are 3 rope seals that you will need to inspect – one around the edge of the top door, one around the glass, and one around the bottom door.
The fire rope should be kept firmly in place, and it should remain flush to the cast iron. If any rope has come loose or worn away, then you can replace it with our fire rope and glue kit. Maintaining this part of your small wood stove will prevent any smoke or soot escaping from the appliance. The rope seals also act as cushioning, as they stop the top and bottom doors from scraping against the main body of the stove.
3) Once you’ve opened the top and bottom doors, take a good look inside your small wood burning stove to check the internal components. Apart from the main body of the stove, the internal parts are consumable and will be subjected to wear over time.
If you have been burning the stove too vigorously, or if you’ve been burning high-temperature fuels like anthracite, then you might find that you have worn through the centre grate, or the fire bricks at the back and sides of the stove. If you are using fire bricks made from vermiculite, then these will wear down quicker than our cast iron bricks.
Alternatively, the baffle may have become warped over time. You will need to remove the side bricks before you can remove the baffle. The baffle can be taken out of the stove by lifting it up, moving it towards you, and then tilting it down. You can then rotate the baffle before extracting it through the top door of the stove. If the baffle has become stuck in place, then you may need to tap it with a rubber mallet to help ease it out.
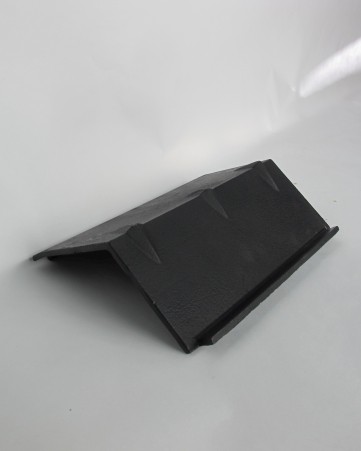
The baffle that’s inside the firebox of our small wood burning stoves.
Our Hobbit stove and Hobbit SE have a 5 year warranty when you register your stove with us, and our Little Range Cook Stove has a 7 year warranty when you register your stove with us. The internal stove parts are not covered by the warranty, as these will naturally wear down over time and will need replacing. We stock all of our spare parts in the spares and maintenance section of our website, and we guarantee the availability of our spares for 10 years.
4) Now that you’ve examined all of the essential working parts of your stove, it’s a good idea to step back and see how it’s looking! The appearance of the appliance is still important when maintaining your small wood stove. If you think the stove could do with a fresh coat of paint, then make sure you take a read through this article here, where there’s also lots of helpful videos that will guide you through the process.
Painting your stove is a great idea if you want your tiny wood burner looking as good as new. It’s also a great way to cover up any stains that have occurred from cooking on your stovetop, or you might just fancy freshening up your stove with some different colours!
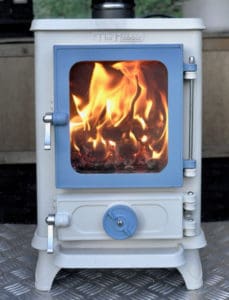
Painted Hobbit Stove
Warning: After you have painted your stove, the appliance will need to be properly cured. This can be done by lighting a series of small fires. Each fire should gradually increase in size, and you should let the fire fully go out before lighting the next one. A strong odour may be released by the paint whilst it cures. Ensure the room is well ventilated, and this will stop after the first few firings.
If you do not cure the paint properly, then the paint could bubble or flake off. It is your responsibility to ensure that you have cured the paint properly, as we cannot be held liable for any issues that could arise if the process is not carried out correctly.
5) Lastly, you will need to check your flue system and the chimney itself. This should be carried out by a professional chimney sweep at least once a year. Your chimney sweep will be able to thoroughly clean and inspect your flue system to make sure it’s free of any blockages, and so that it’s safe to use.
Your chimney sweep will probably be able to service your stove for you as well, but if you need somebody to take a look at your Hobbit stove or your Little Range to make sure it’s functioning correctly, then you can enter your postcode on our authorised dealers page to find your nearest local business.
It’s still beneficial if you’re able to notice any obvious problems yourself, so we’ll take you through a few useful tips below:
Maintaining The Fire Cement Around Your Stove Collar
1) Start by taking a look at the stove collar. If you have a Hobbit stove, then it can be configured with a top or rear exit, so you might need to get behind the stove to take a good look. On the other hand, our Little Range can only have the flue exiting from the top of the stove, which makes this step a bit easier.
2) Carefully examine the join where your single wall flue pipes, or an adaptor, connect into the outlet of your small wood burning stove. There should be a solid ring of fire cement around the base of the flue pipe to provide a good seal and to keep your flue parts firmly in place. If there are any cracks or gaps in the fire cement, then it’s a good idea to re-do this.
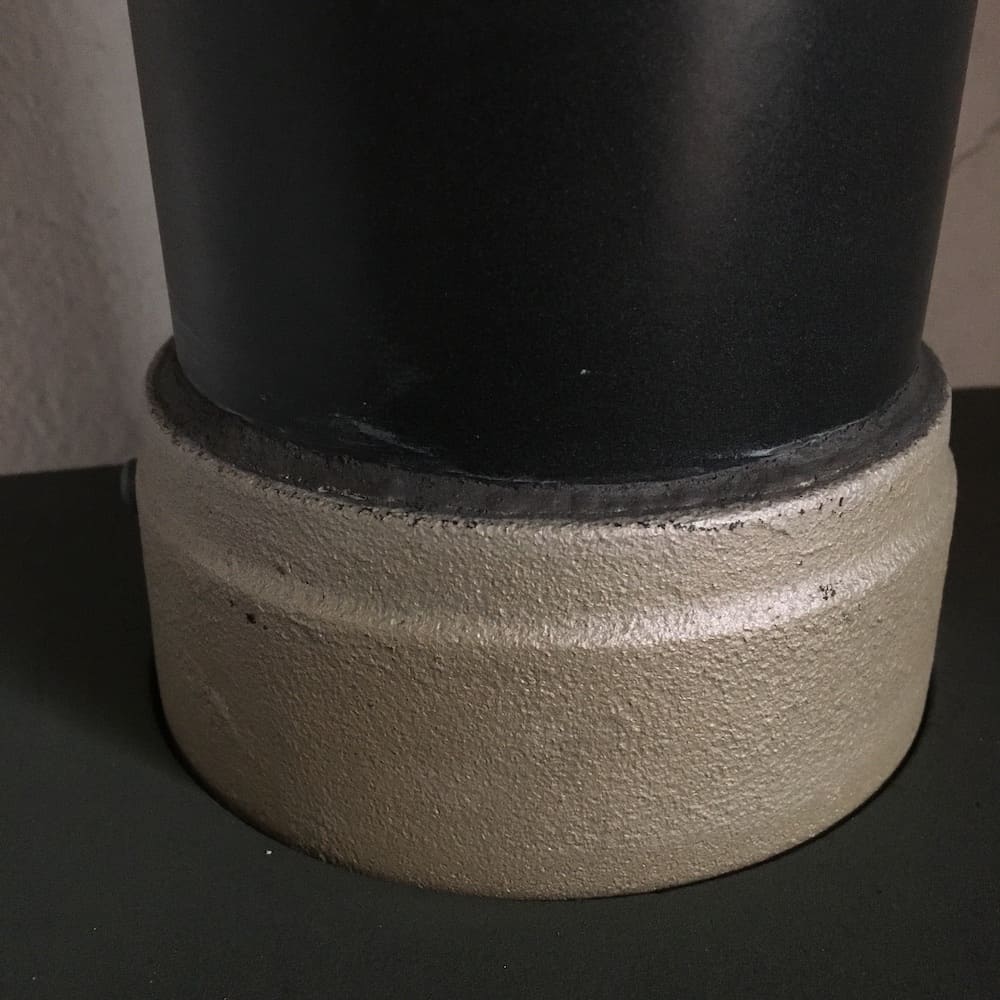
This is what the fire cement should look like around the stove collar.
3) You can remove the fire cement by giving it a tap with a rubber mallet, before wiggling the stove out of place. You may need 2 people in order to safely move the appliance. Next, carefully cut the nozzle of the fire cement with a sharp blade, so that you can apply the right-sized bead. Fit the cartridge into a caulking/sealant gun before applying the fire cement in place. You can easily scrape away any excess cement so that there’s a nice clean finish. You will need to give the cement plenty of time to dry before you fire up your stove again.
Checking Your Flue System
Warning: This task should be left to a qualified professional. If you think there is a problem with your flue system, then do not attempt to fix it yourself. We strongly recommend that you contact a local HETAS installer/chimney sweep to assess your chimney and to resolve any issues.
This should be left to a professional, but there’s still a few things that you can do yourself. Here are a couple problems that you may encounter, along with some quick fixes:
1) Is your stove squawking? If you can hear some unusual sounds coming from your small wood burning stove, then there’s a good chance you might have some visitors on the roof! Seagulls will often nest on chimneys throughout summer when your stove is not in use, which can lead to all sorts of debris falling down the chimney and blocking the liner.

Be observant – take a moment every now and then to open the top door of your stove and put your ear to firebox to hear if you have any unwanted guests on the roof of your structure! If you can see the top of your chimney from a bedroom window or your garden, then you can take a quick look to see if there’s any birds nesting on your chimney.
You may wish to light your stove occasionally to deter any birds from perching on your roof. There’s also a wide range of different spikes and bird guards that can be installed on your rooftop to stop birds from nesting. If you’re happy for birds to nest there, then there’s nothing you need to do! The nest can be safely removed when it’s no longer in use, and a chimney sweep can clear away any debris.
2) British weather.

Although it’s the middle of summer, you might still experience some particularly stormy weather. If you can see any flue parts have come loose or been damaged, then we offer a wide range of extra flue parts that have been manufactured by Midtherm.
You can also visit our authorised dealers page to find your nearest installer, who will be able to pop over and check your flue system to see if any parts need to be replaced.
Storing Your Small Wood Burning Stove
After cleaning the appliance and carrying out any repairs, your stove will need to be shut down a certain way. You will need to ensure there’s a good airflow through the appliance, as this will help prevent condensation from forming, which can lead to rust. You’ll also want to remove any ashy deposits in the stove, as these can be corrosive if left over time.
You can do this by keeping the top and bottom doors shut, but make sure you leave a small gap behind the air wheel. It’s also a good idea to leave the secondary and tertiary air controls in the open position. This can be done by flicking the levers to the right-hand side. If you have a non-Eco Design Hobbit stove, then you’ll just need to flick the secondary air vent at the back of the stove into the open position, which is to the left-hand side.
Other Uses For Your Small Stove Over Summer
1) Outdoor cooking! It’s very easy to remove the fire cement in order to uninstall your stove, so why not take your Hobbit stove outside for some wood-fired stovetop cooking! This is exactly what we did when we decided to make some spicy tomato ketchup over the summer.
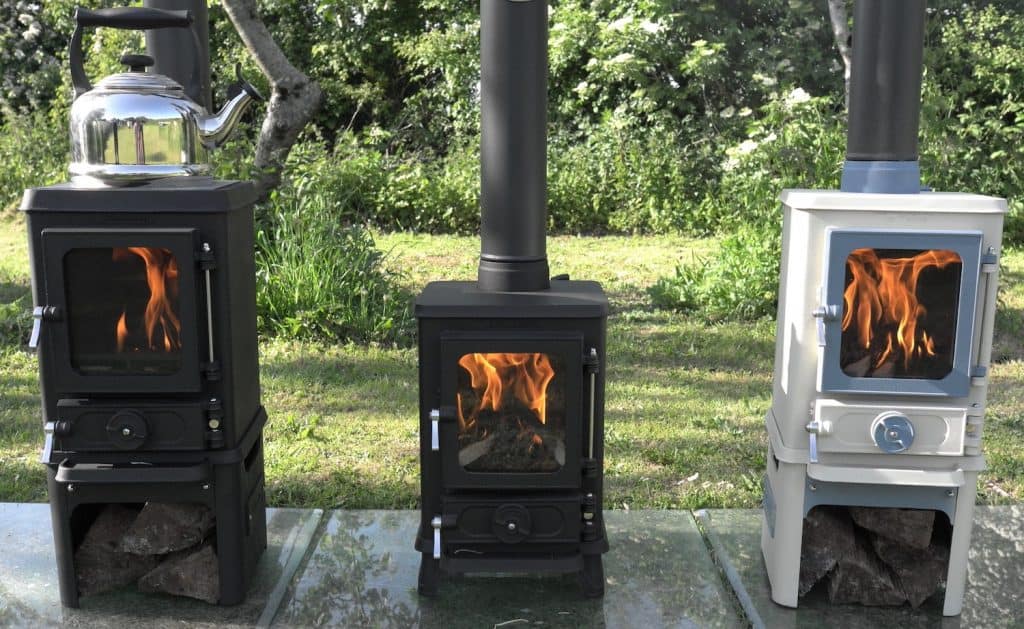
Once you’ve removed the stove from its original setting, make sure you fix a plastic bag to the bottom of the flue with a couple elastic bands, as this will prevent any rain or condensation from falling into your fireplace. When you’ve taken the stove outside, you’ll need to insert a 1000mm length of 4″/100mm single wall flue into the stove, so that your tiny wood burner has a good enough draw.
You can then sit around a fire with your friends or family without any smoke blowing into everyone’s faces! Whilst the fire is lit, you can toast some marshmallows over the embers in the firebox with our T1000 toasting fork. You could even place a griddle pan, a black cook pot, or a grey cook pot on top of your stove, so that you can cook dinner at the same time!
Tip: When you have finished using the stove outside, make sure you cover the stove and store it in a warm, dry place. If the stove is left outside in the elements, then it will rust.
2) Make a heartwarming display!

A stove sits at the heart of the home, and it’s a great focal point in any room. As the fire won’t be lit, why not make a display by decorating your fireplace?
You could place some summer photos or any holiday pictures on top of your stove, along with any objects or souvenirs that you’ve collected on your travels. Our stovetop goddess makes a beautiful display piece, and you can use it for essential oils, or for burning incense. The little dish is also perfect for storing trinkets!
3) If you’re missing the warm glow of a fire, then why not recreate it with some atmospheric lighting! You could place a candle inside the firebox of your stove whilst it’s not in use, or even some fairy lights, which will give a very cosy effect.

If you have any questions about maintaining your small wood stove, then do not hesitate to contact us!
The information on this page is specifically tailored to our Hobbit stove and Little Range, but you can use this article as a guide to maintaining almost any small wood burning stove or a stove cooking range. If your stove has not been manufactured by us, then please refer to the corresponding instruction manual for your appliance, or contact the manufacturer to find out how you should go about maintaining your small wood stove over the summer months.


